Gitlab Pages: A Wordpress Alternative
September 21, 2016
A. Who is this guide for? 
This guide is for someone who doesn’t code, but has maybe set up a Wordpress site or two, and they’re looking to learn how to build a simple, but working, site from scratch. This will include a gentle introduction to HTML, CSS and Javascript as well, since we’ll be using Twitter Bootstrap, which is a front-end framework, to give us a running start. In Part 1, we’ll go over how to setup a domain name with Gitlab Pages, and understand how to make changes to your website.
B. Why not Wordpress 
Wordpress is a popular CMS to set up a site these days. Usually you’ll need some cloud space to host your site. Wordpress is a great product. It offers an easy way to build your site, but it usually comes with a hosting cost. It also obscures the details of how a site works. When you learn Wordpress, you learn the framework, but not the basics of a website works, which is perfectly fine for most cases. Since you’re here to learn, we’ll start from scratch. This is where Gitlab comes in. While its primary purpose is to manage code, it also offers free hosting for static sites. Static sites are often what you’d see for a company’s marketing site, where it displays information and showcases its services. A dynamic site generates pages as needed, like a site people log into and each person is shown personalized information. Most websites these days fall into this category. However, I’d argue that not everyone needs a dynamic website. If you’re looking to set up a basic site - personal portfolio, blog, documentation for a project - this method may be the most cost-effective for you.
C. Sign up for Gitlab Pages 
Gitlab1 is used for managing code, but we’ll use it to host our static website.
-
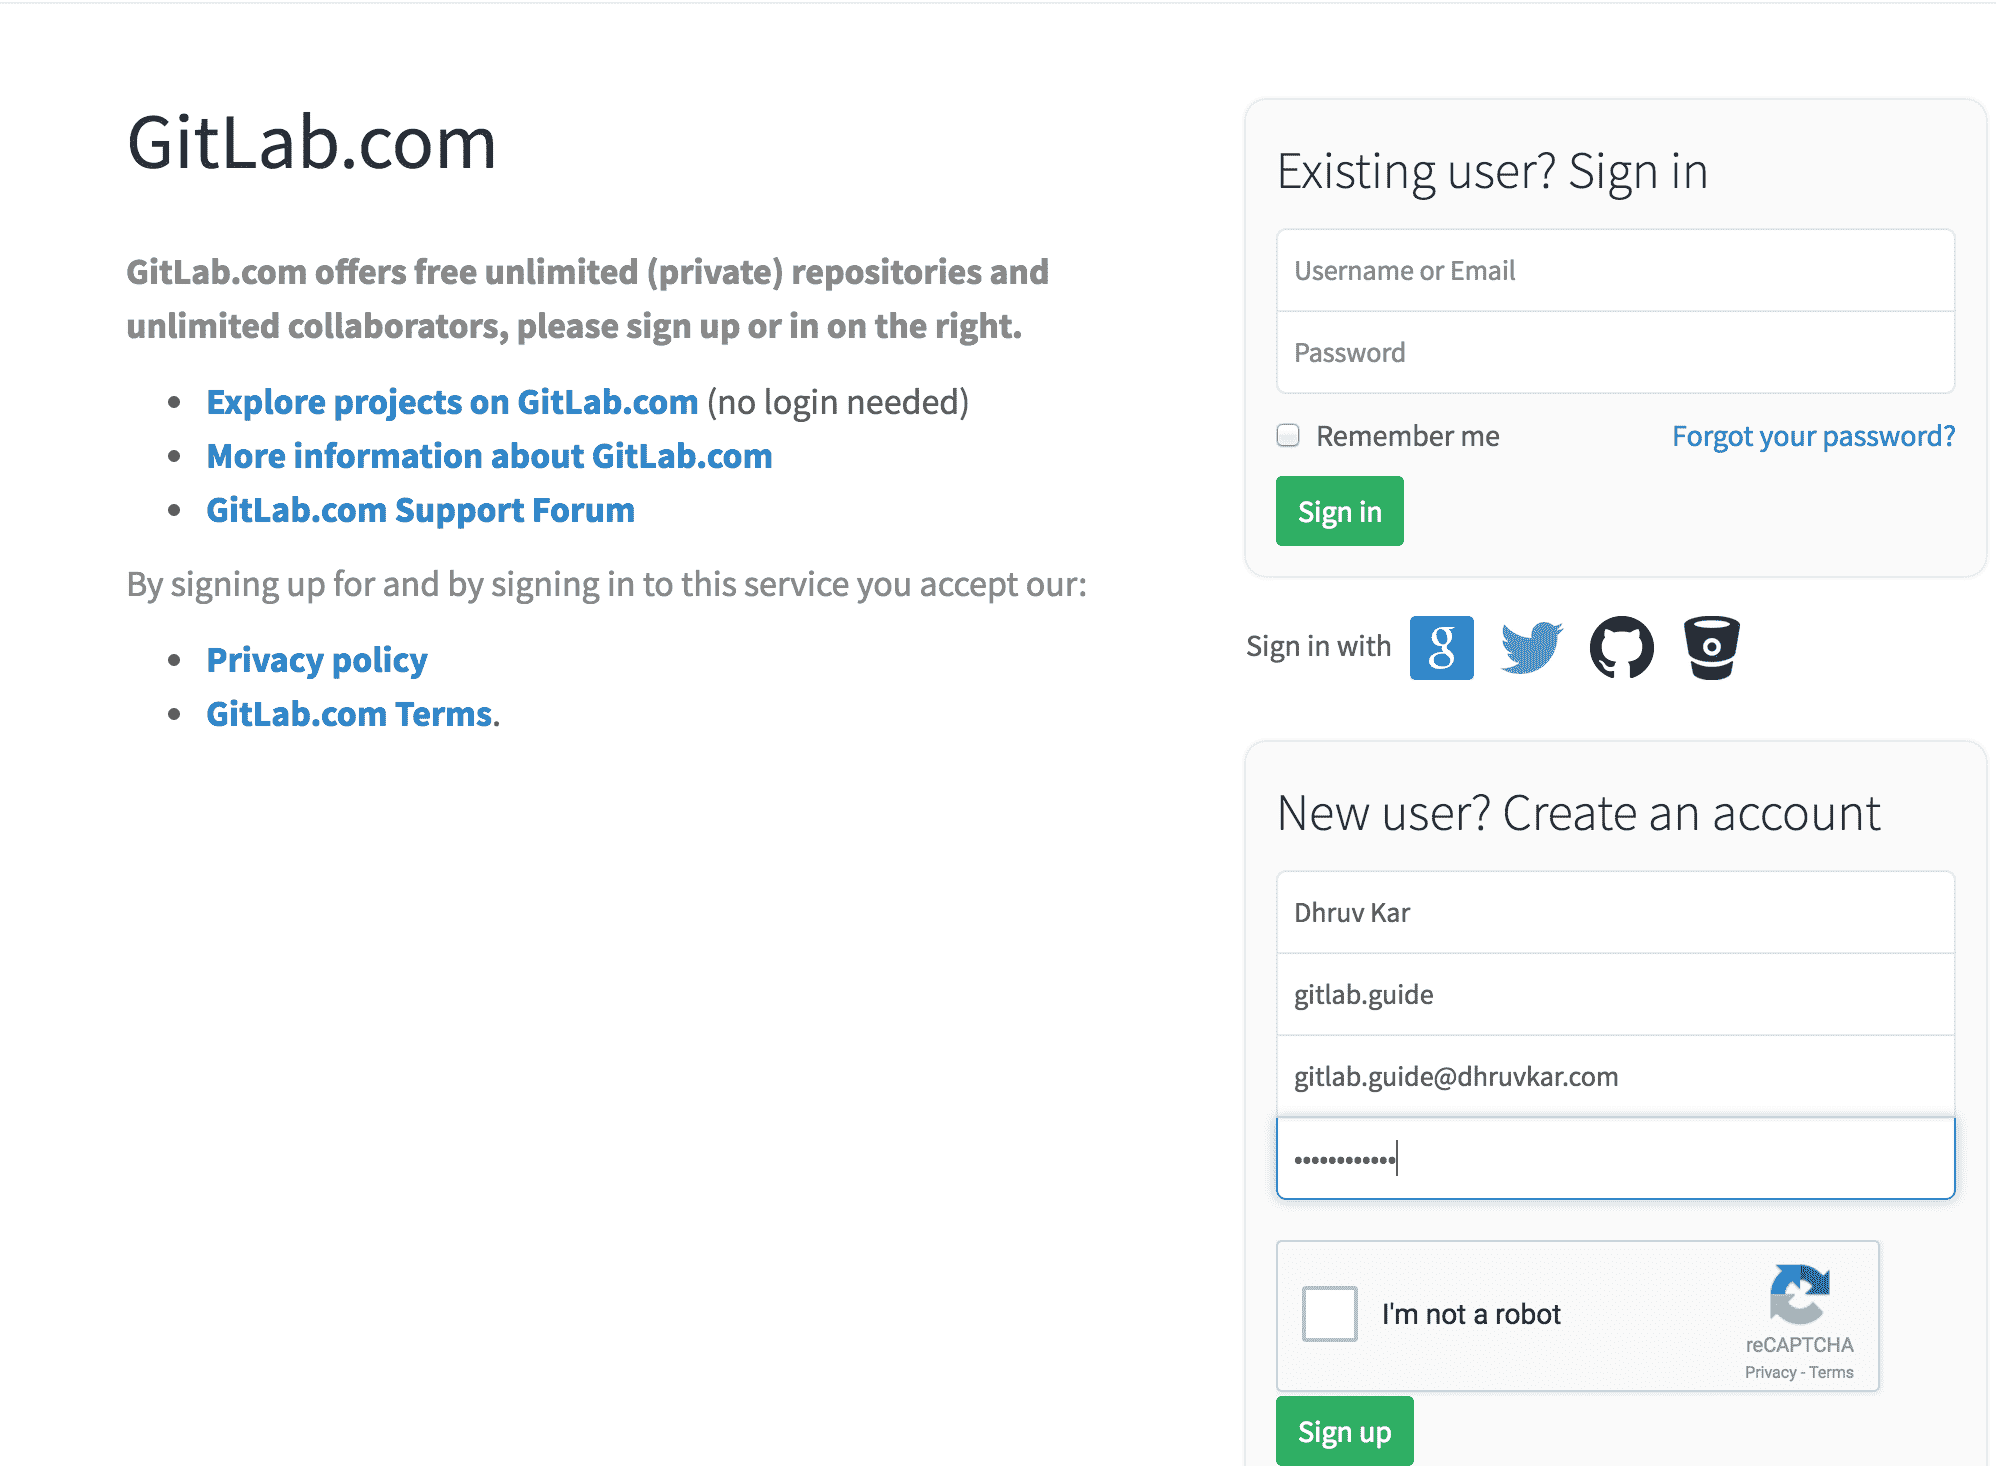
Sign up for an account.
-
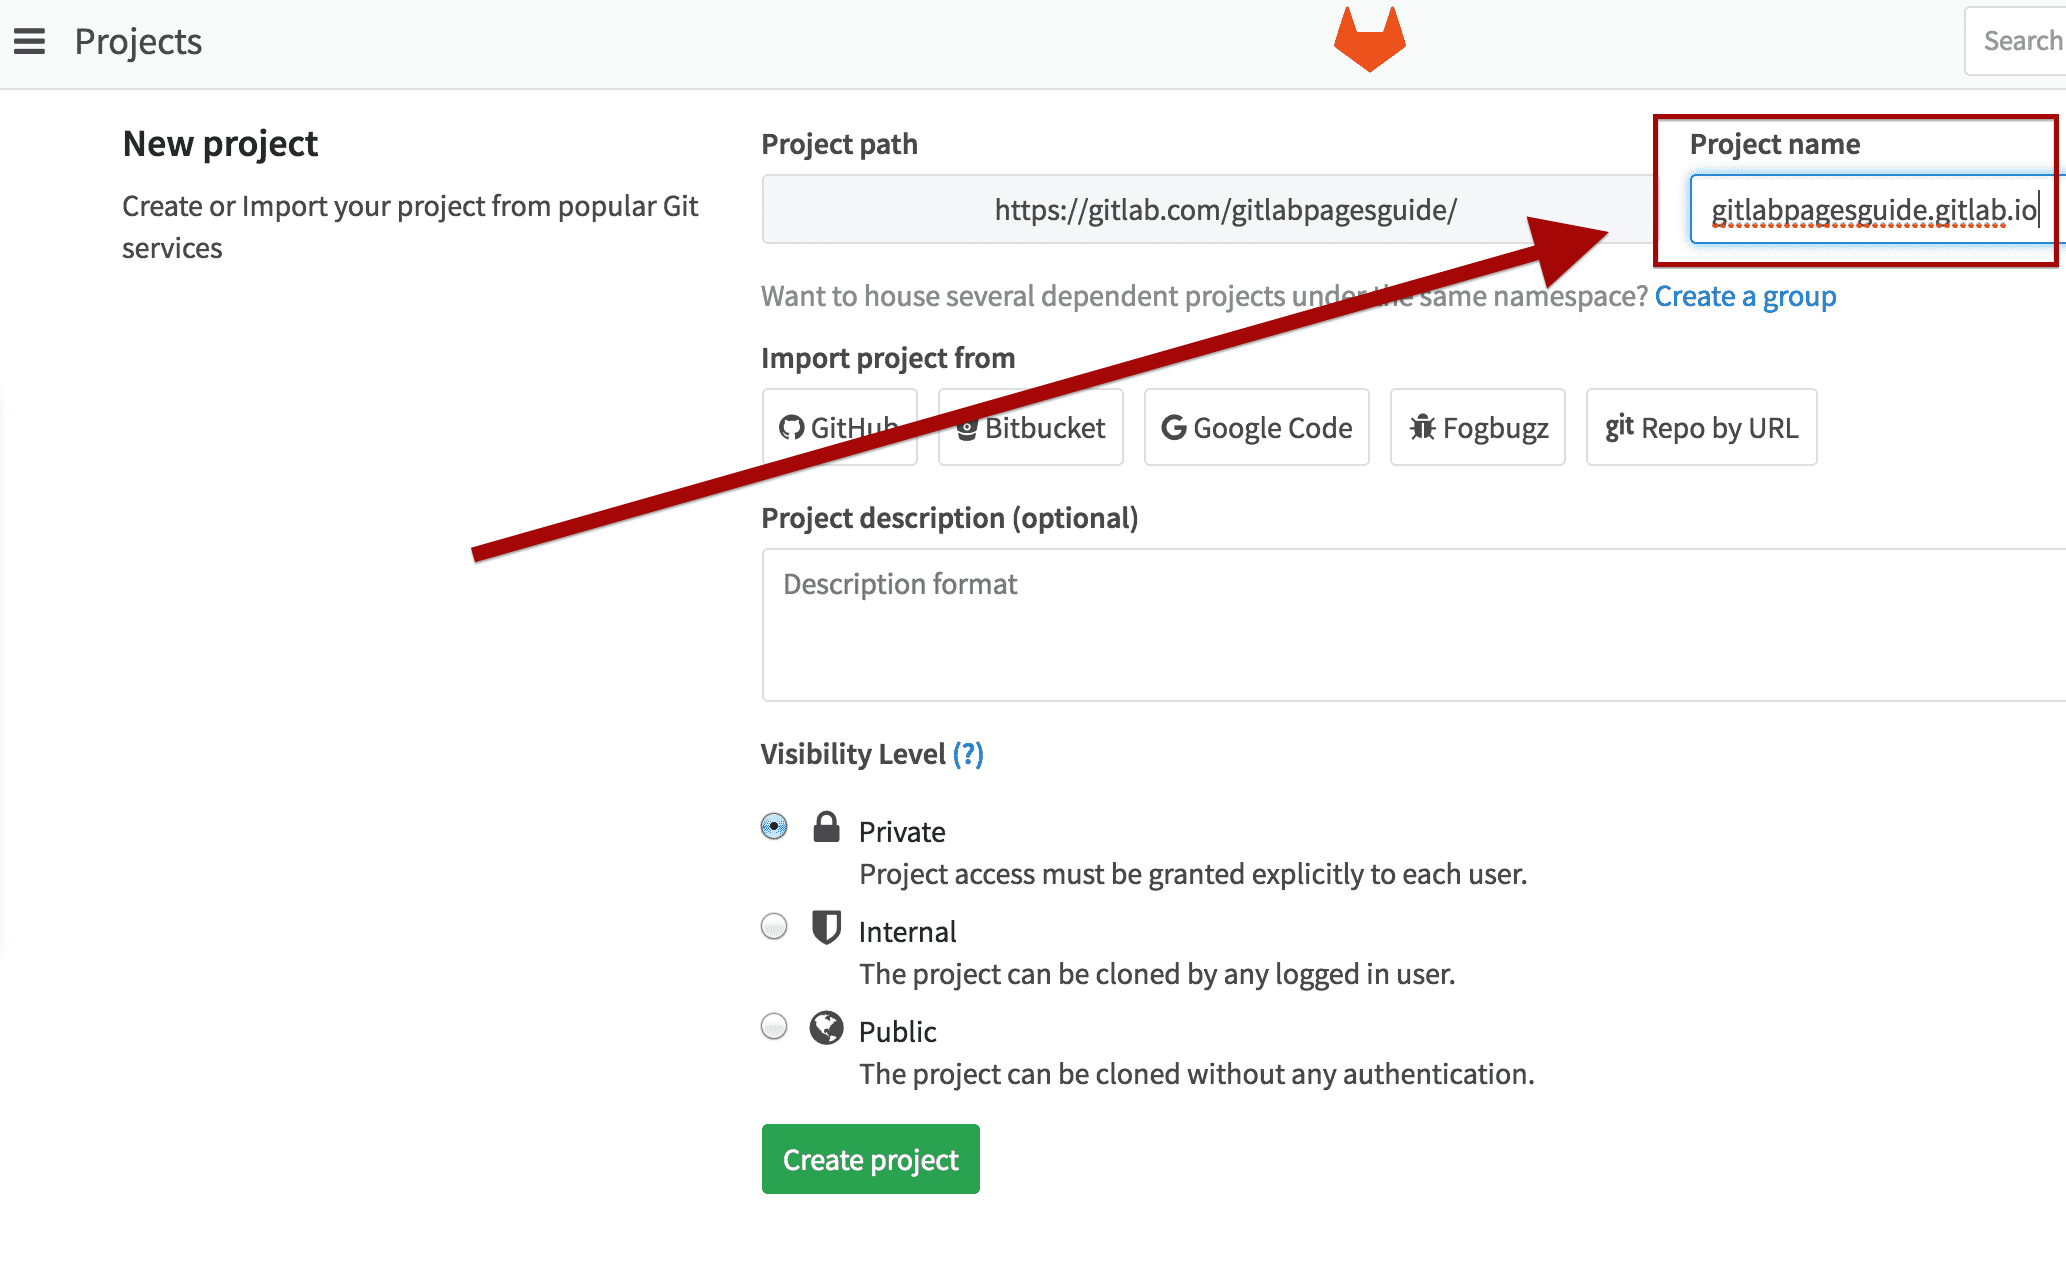
After confirming your account, log in to your Gitlab account and create a new project. Note the project needs to be named YOURUSERNAME.gitlab.io:
-
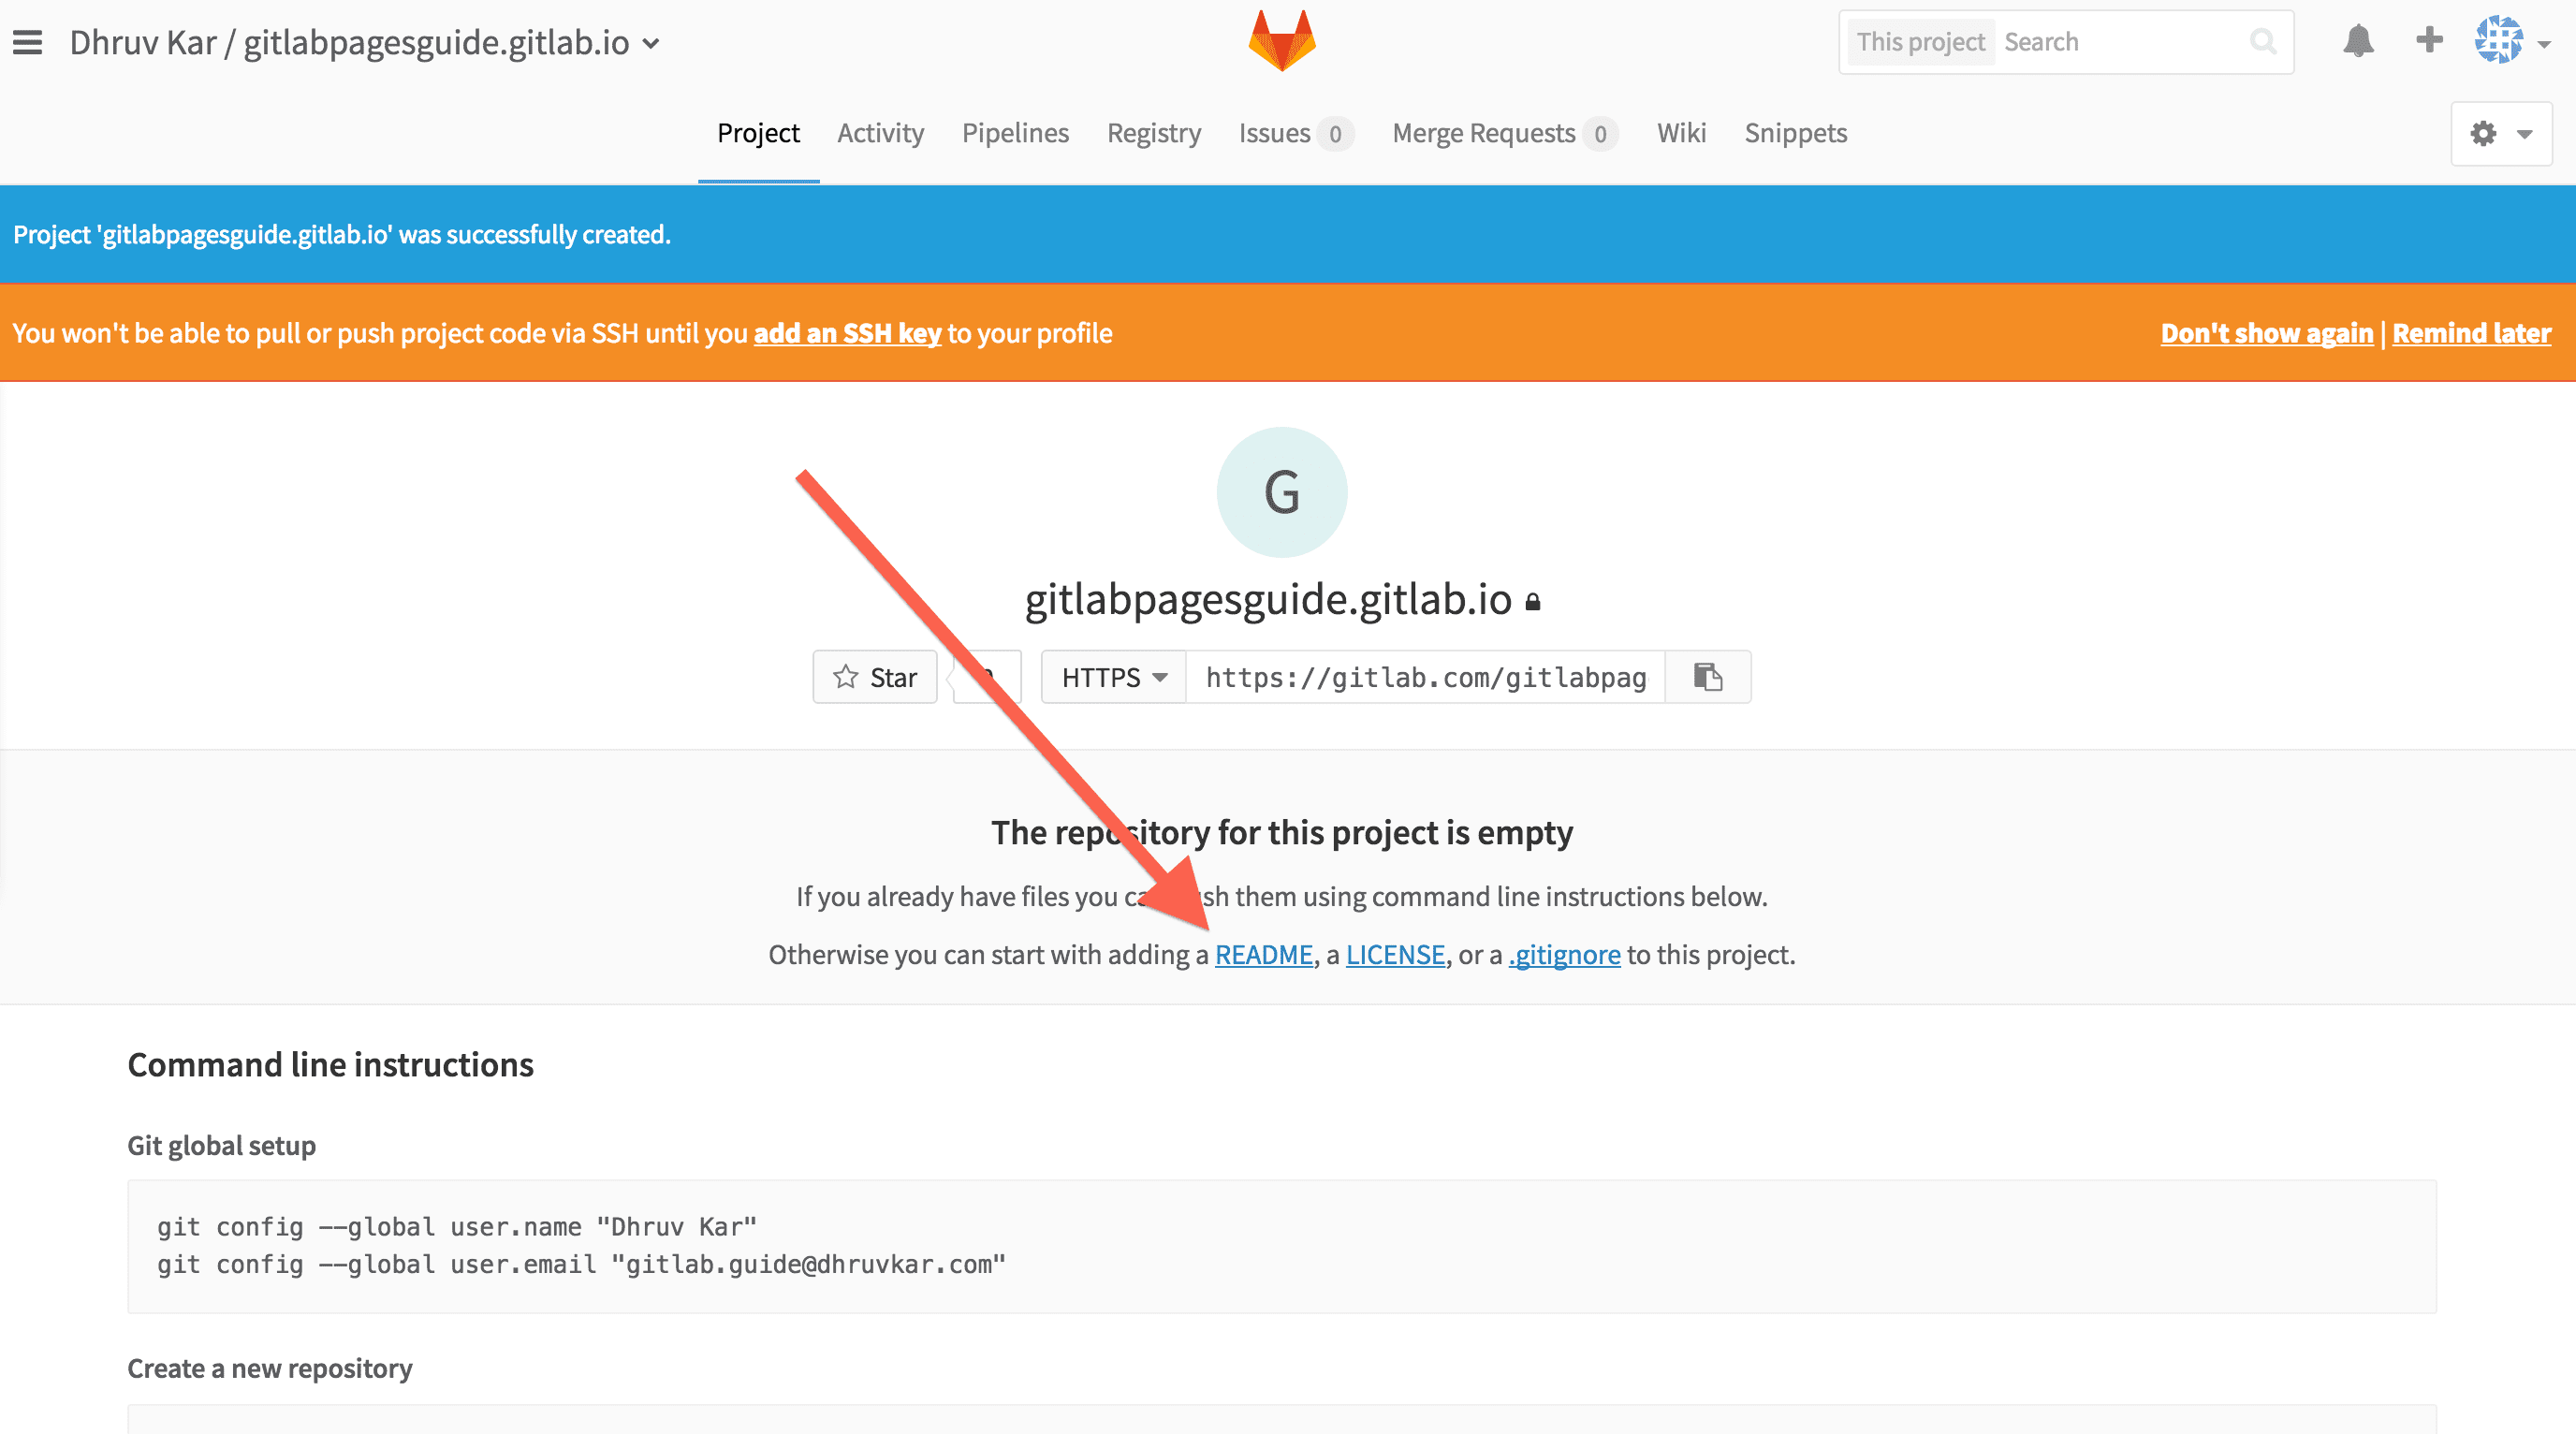
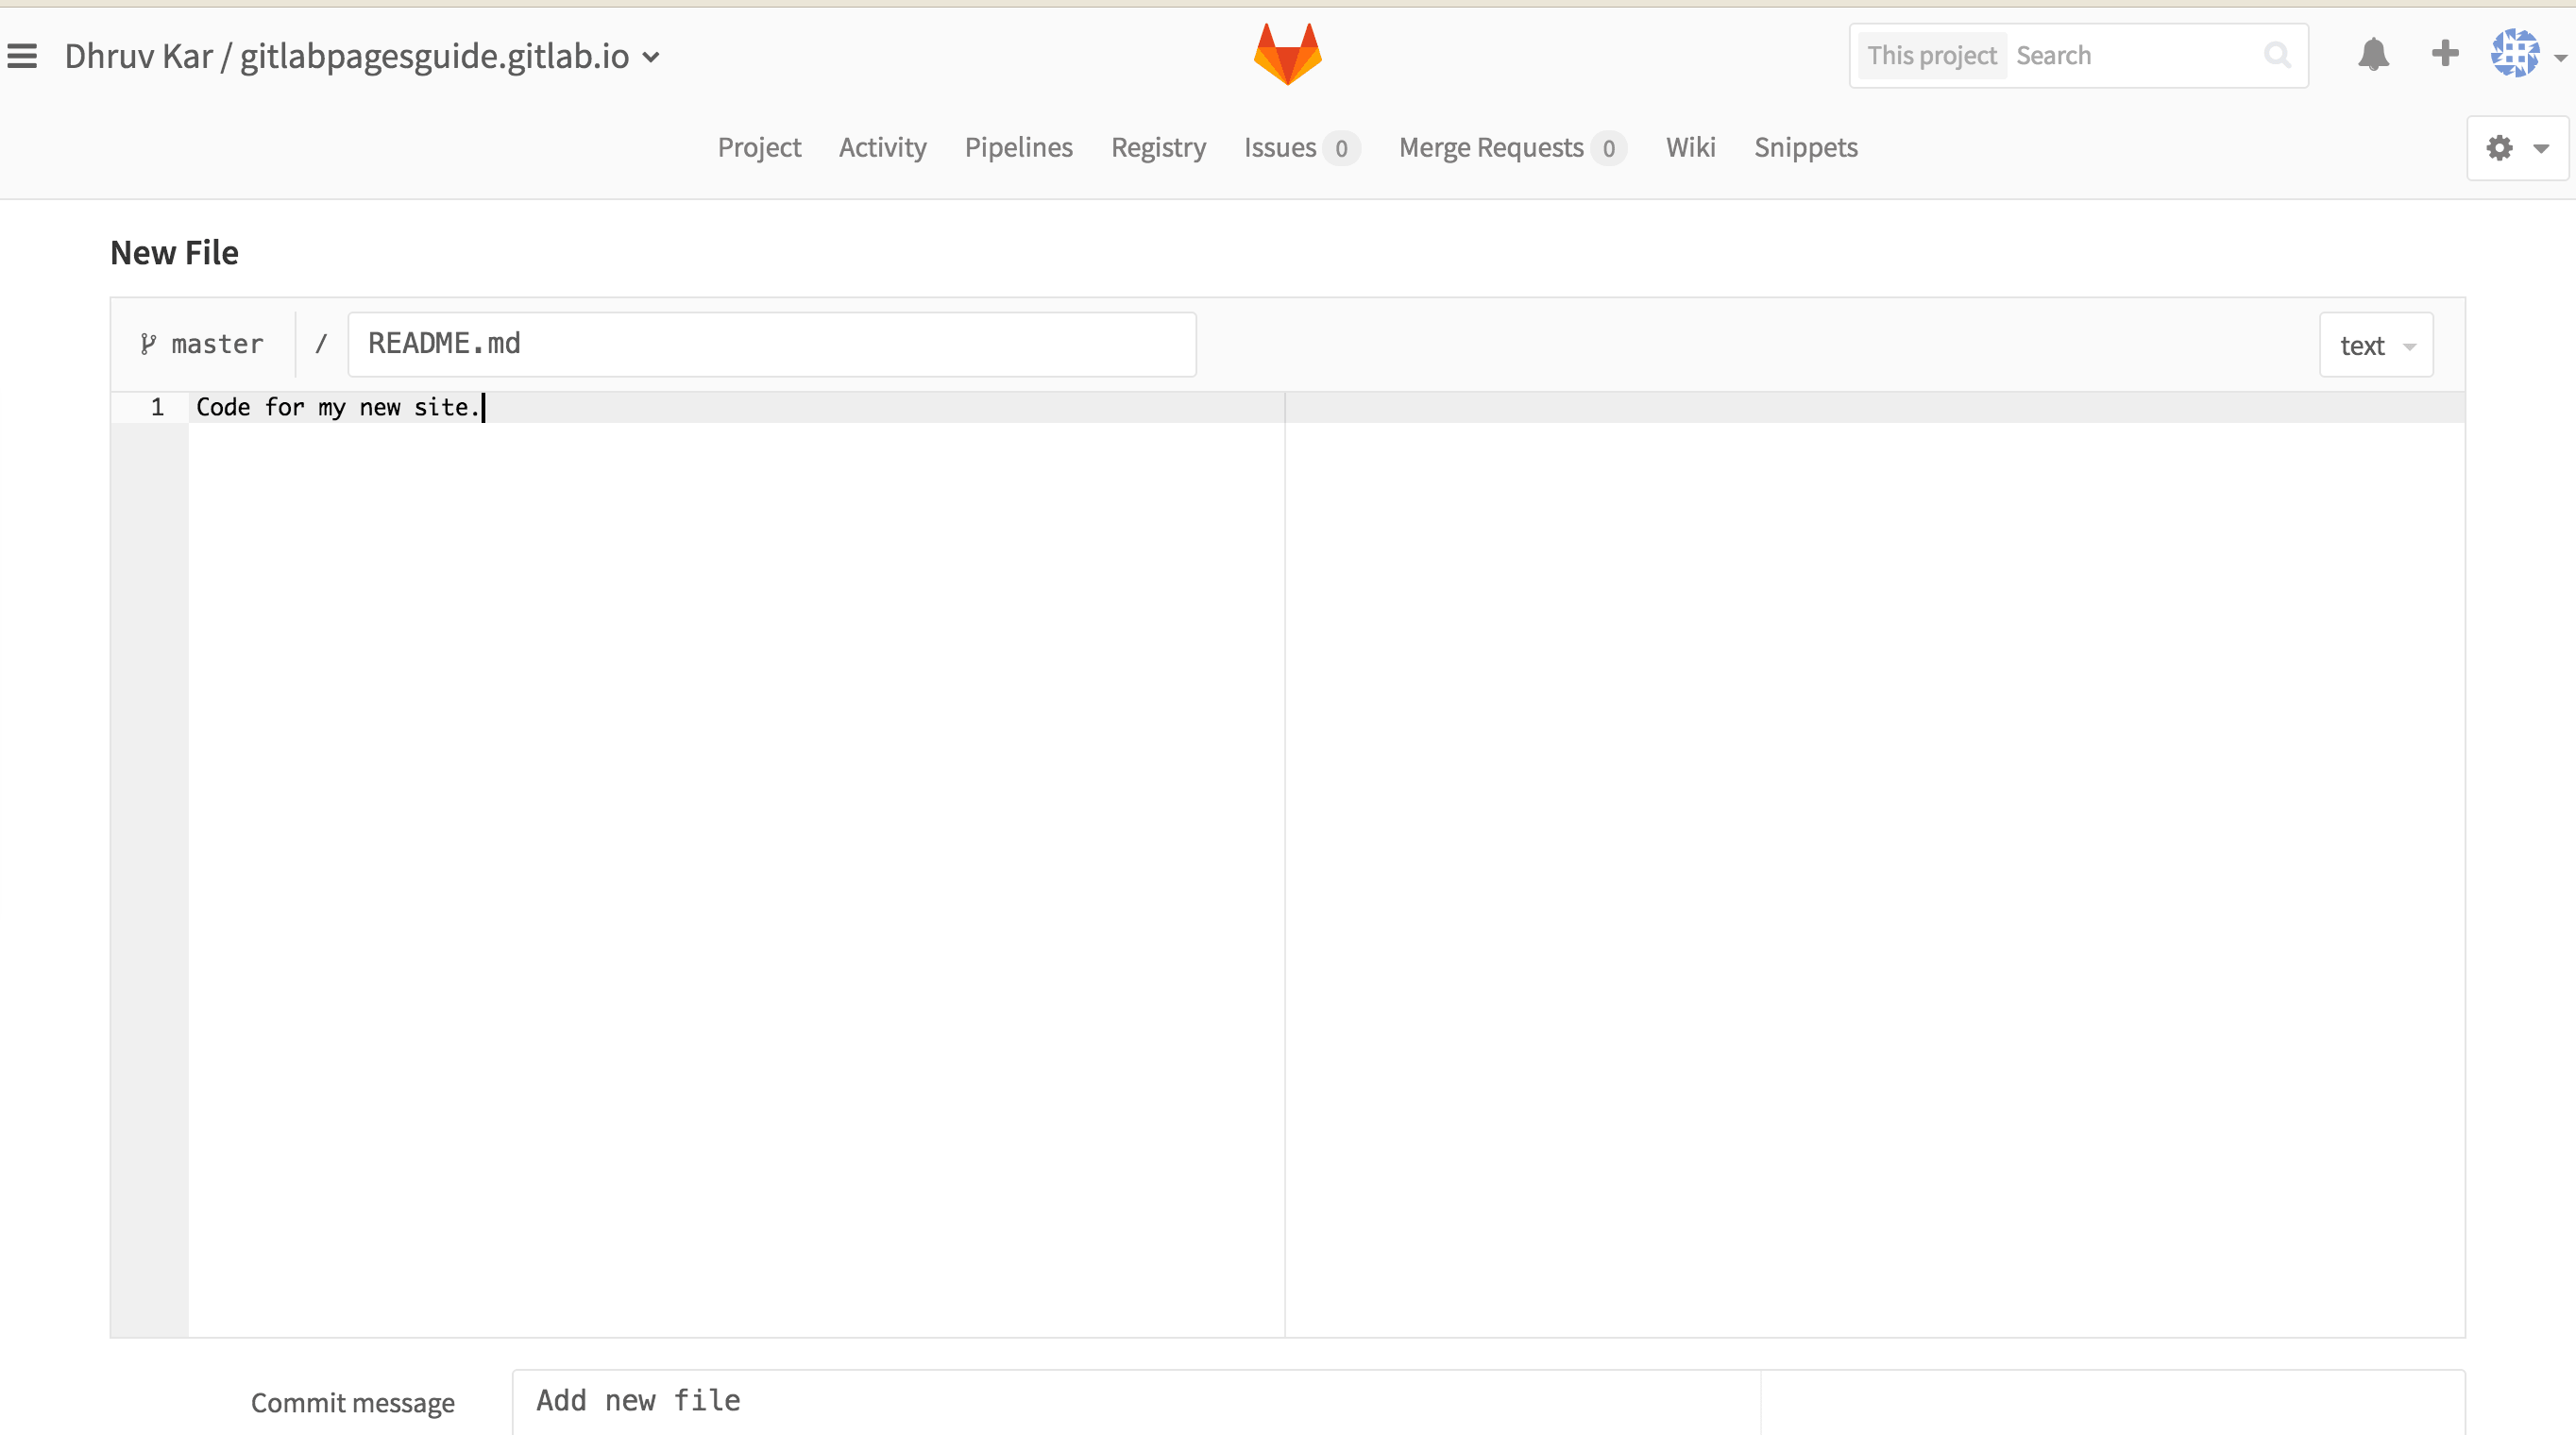
Once you see the new project page, click on “README”, write in what this project is for and click “Commit” at the bottom of the page.
-
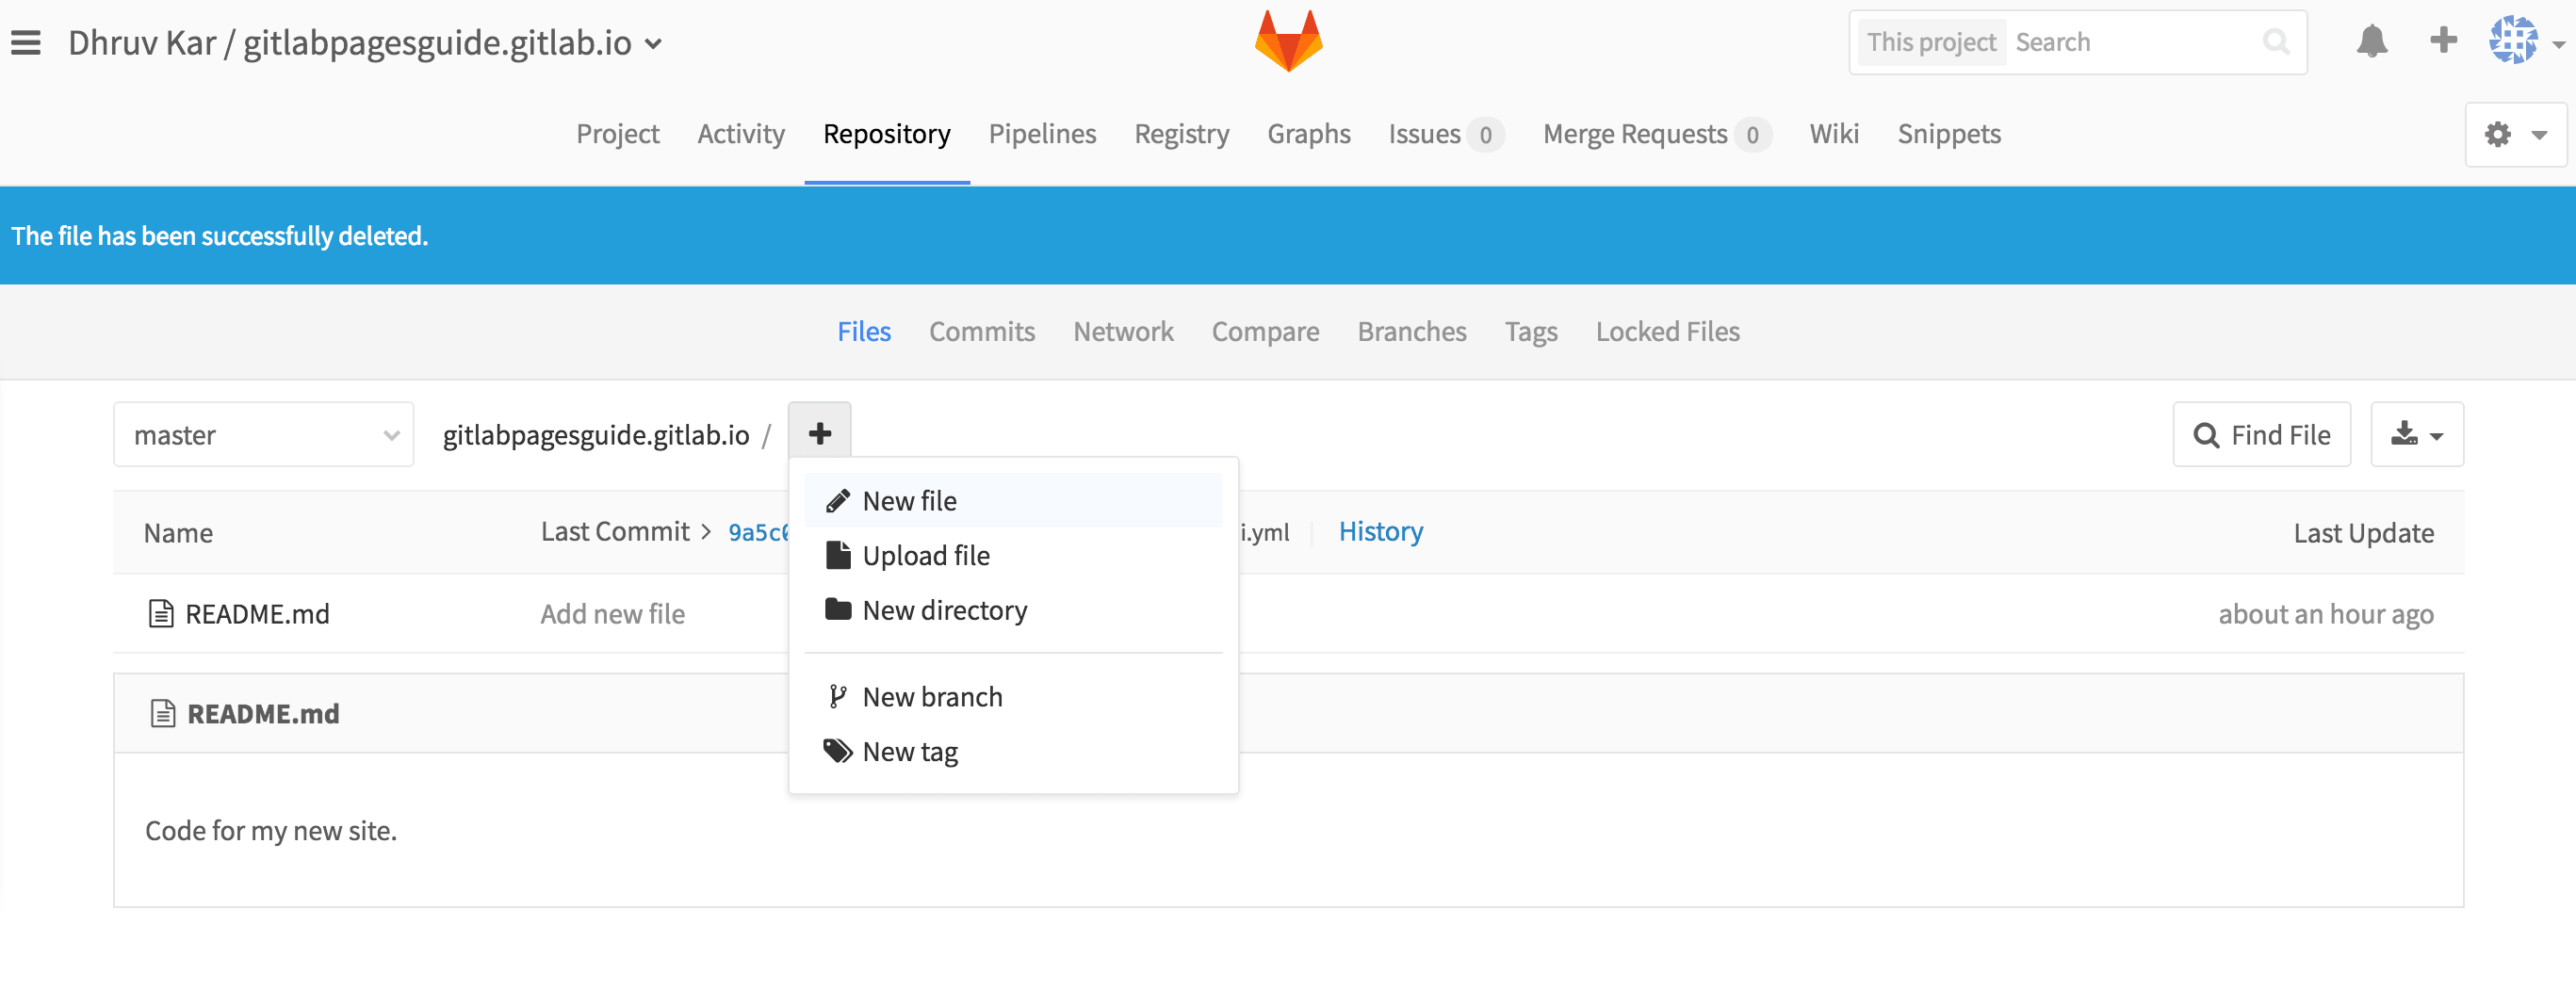
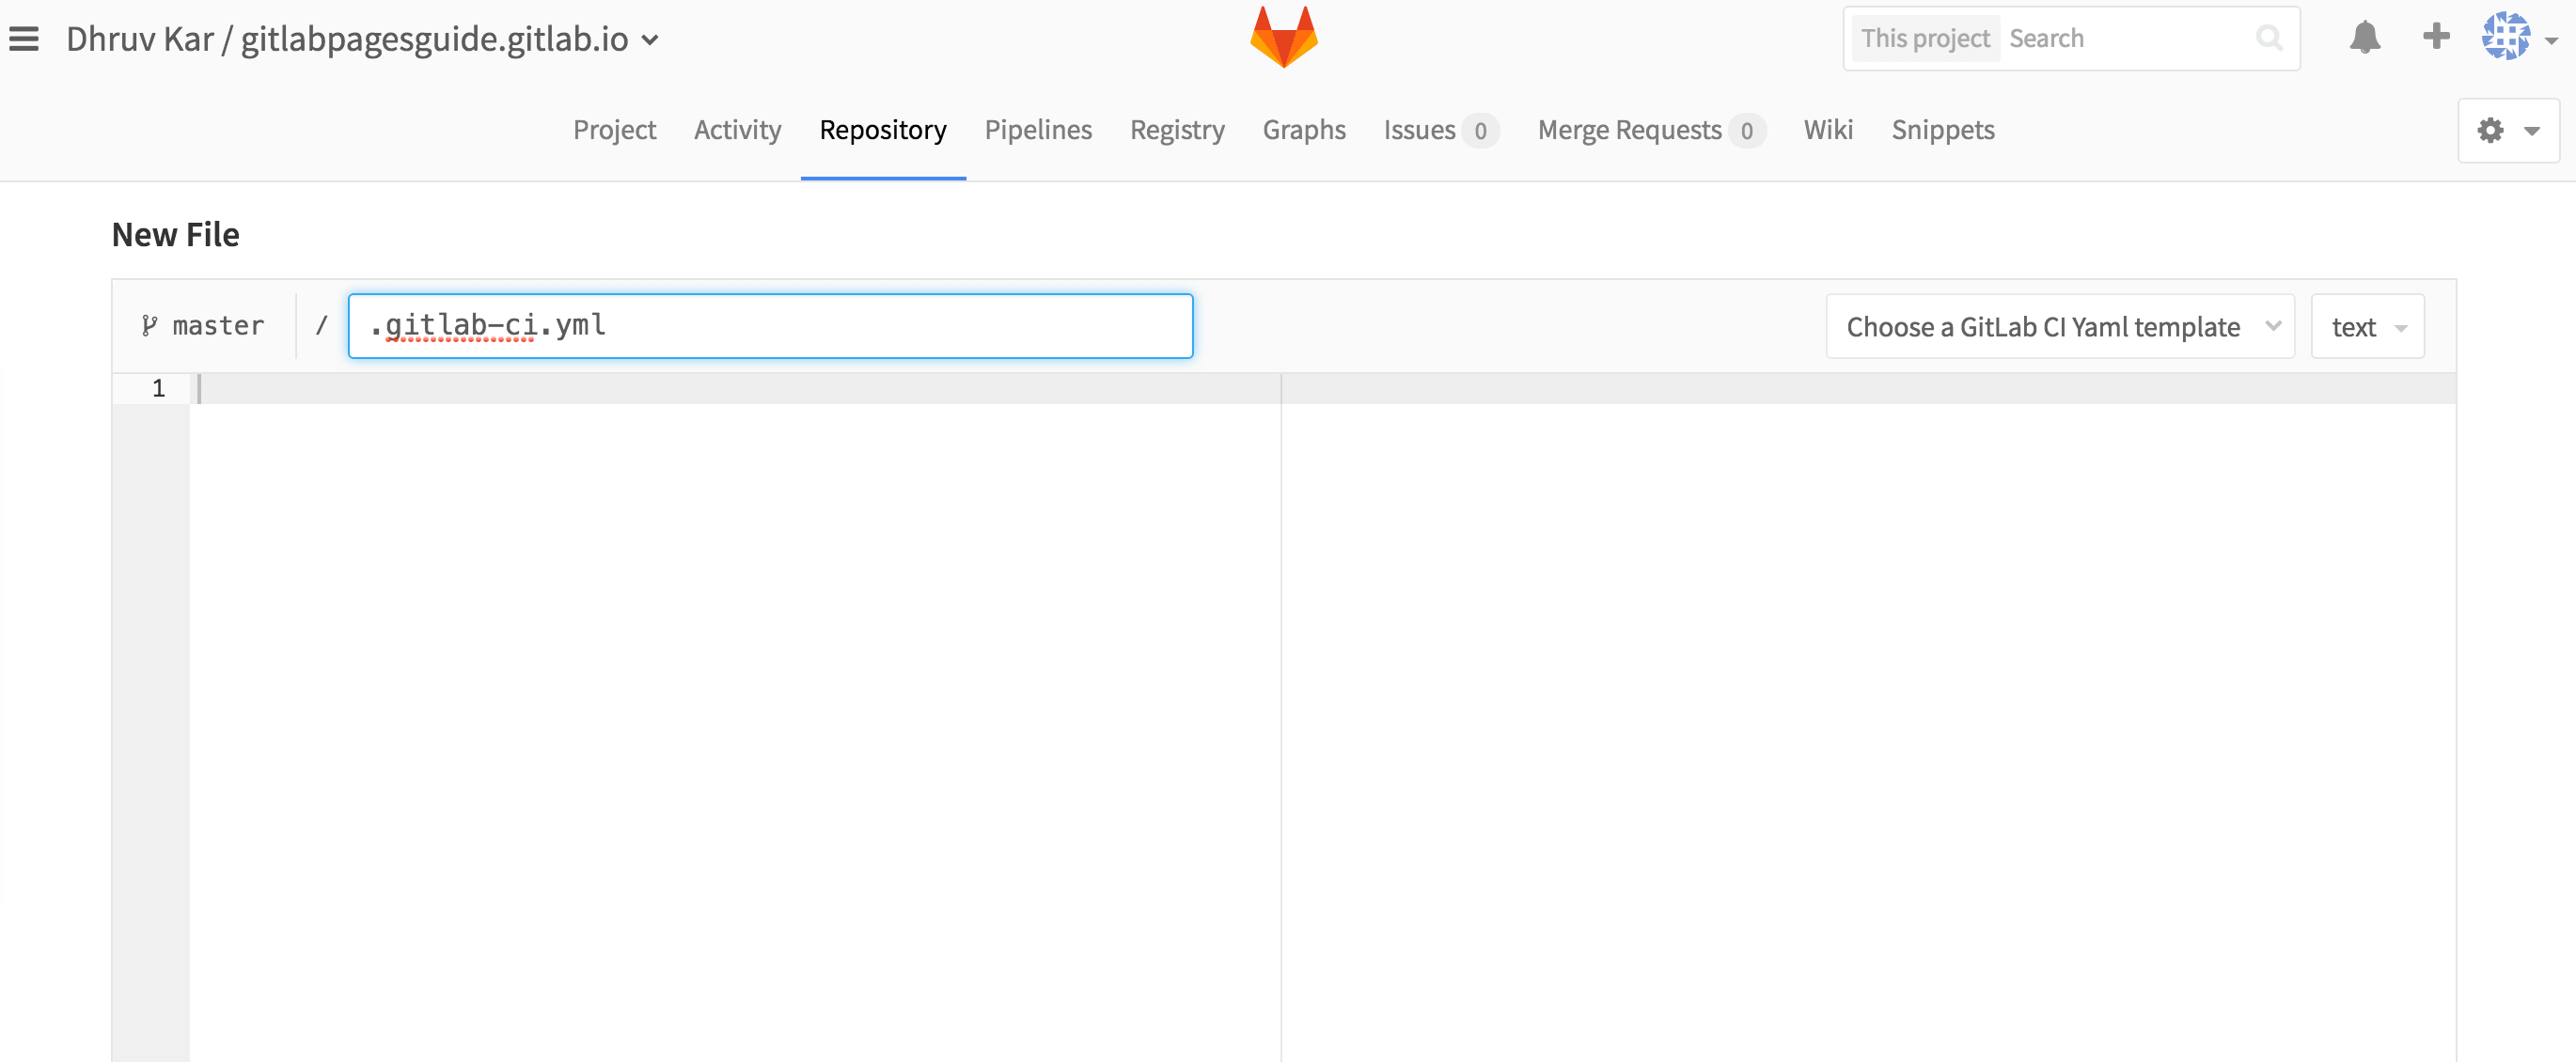
After creating a README, create a continuous integration file. The CI file will build the site everytime we push it to Gitlab.
-
Fill the CI file with the code below. Gitlab builds a static site from everything in the folder named public, then commit the changes.
pages:
  artifacts:
    paths:
    - public
  only:
  - master
D. Add a Custom Domain 
Currently, your site lives at YOURUSERNAME.gitlab.io. If you want your site to be accessible at your own domain name, you can buy one at Google Domains. To set up a site at YOURDOMAIN.com, we’ll need to complete a few extra steps.
-
At your registrar (Google Domains, GoDaddy, etc.) setup a CNAME pointing to www.YOURDOMAIN.com
-
At your registrar, (Google Domains, GoDaddy, etc.) setup an A record pointing to 104.208.235.32. This is the IP address for Gitlab Pages.
-
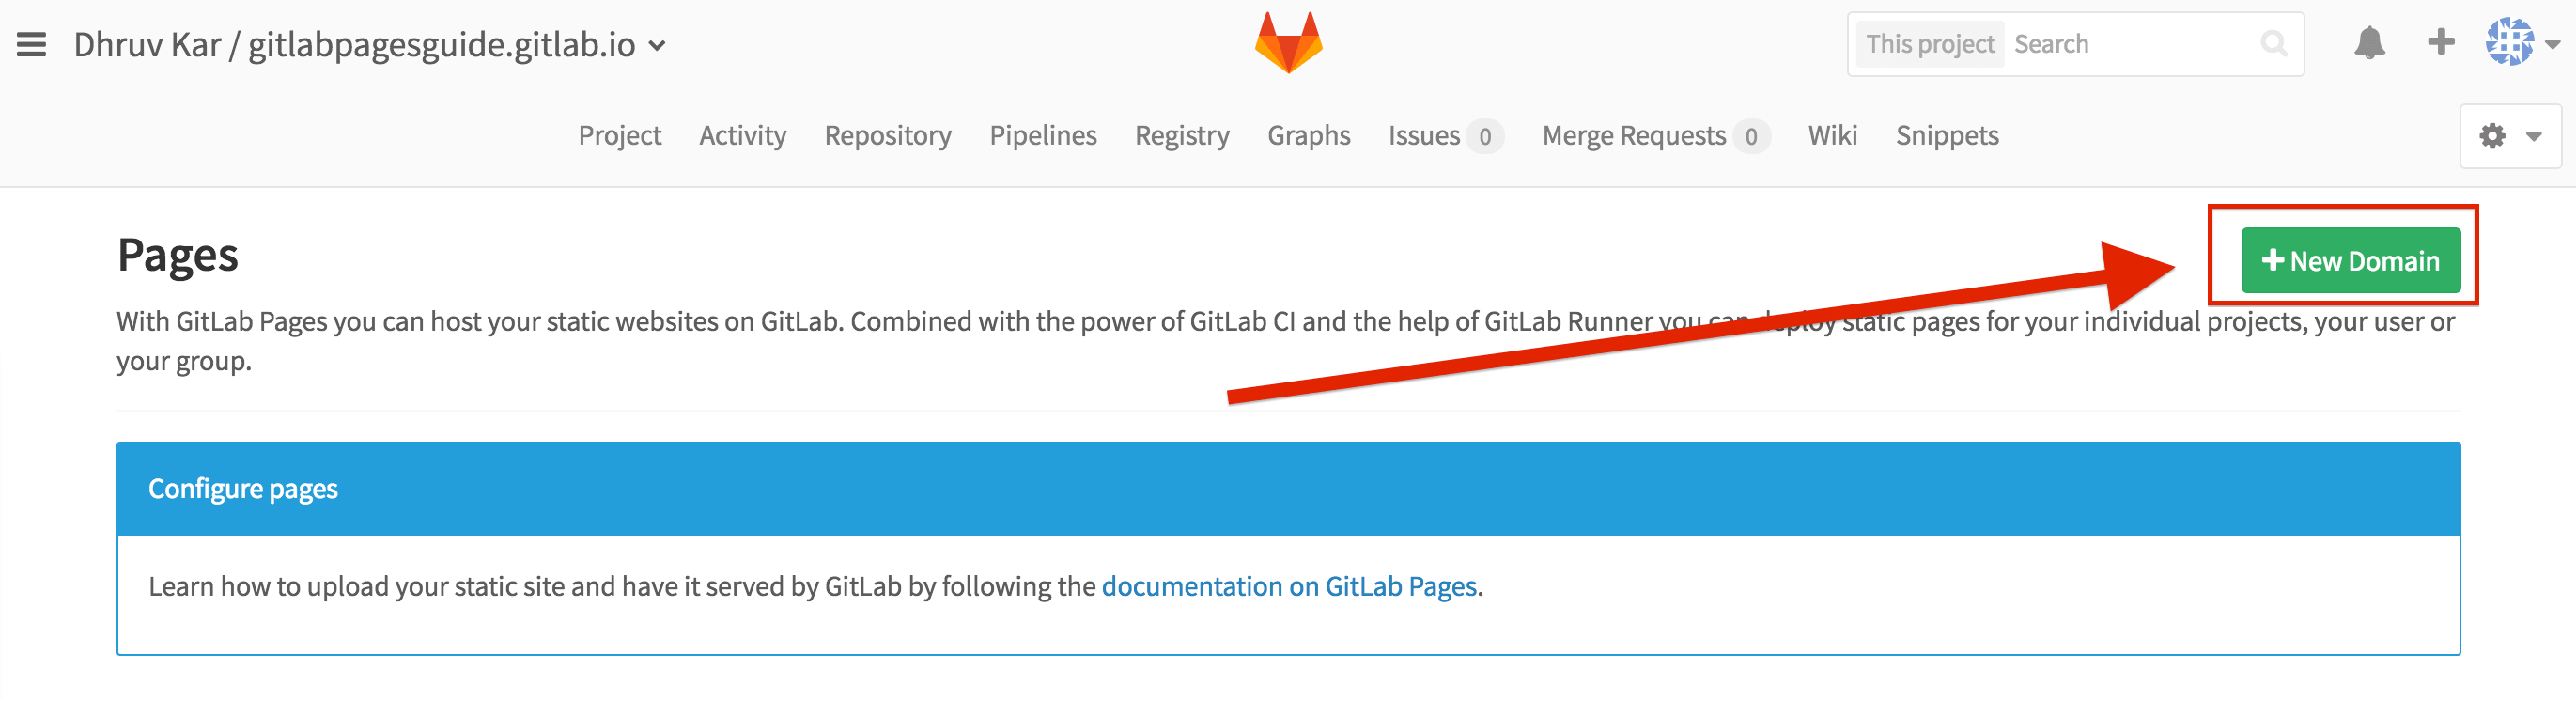
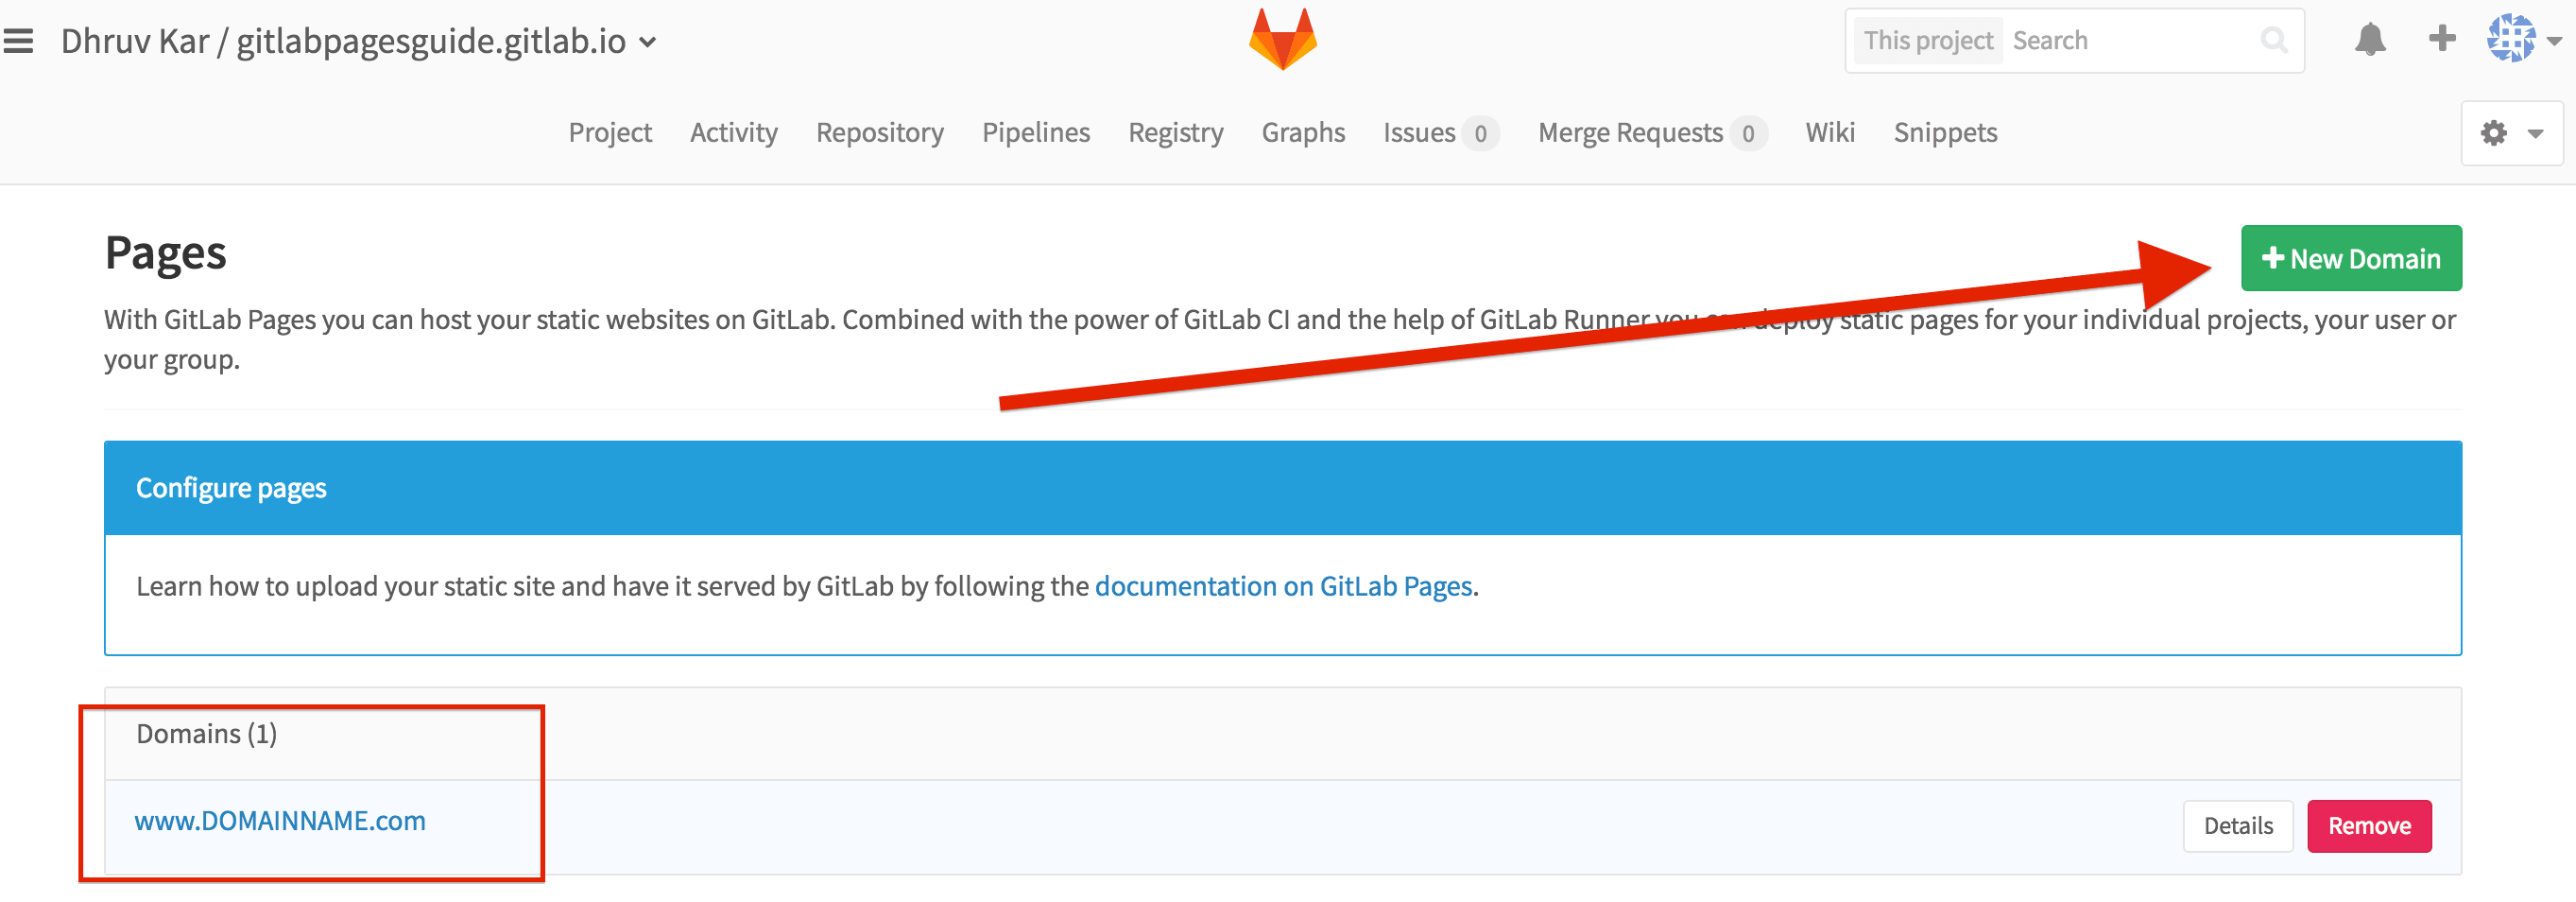
Add your domain name (both with WWW, and without) to Gitlab Pages. Click the gear icon on the top right and click Pages.

Click New Domain on the top right.
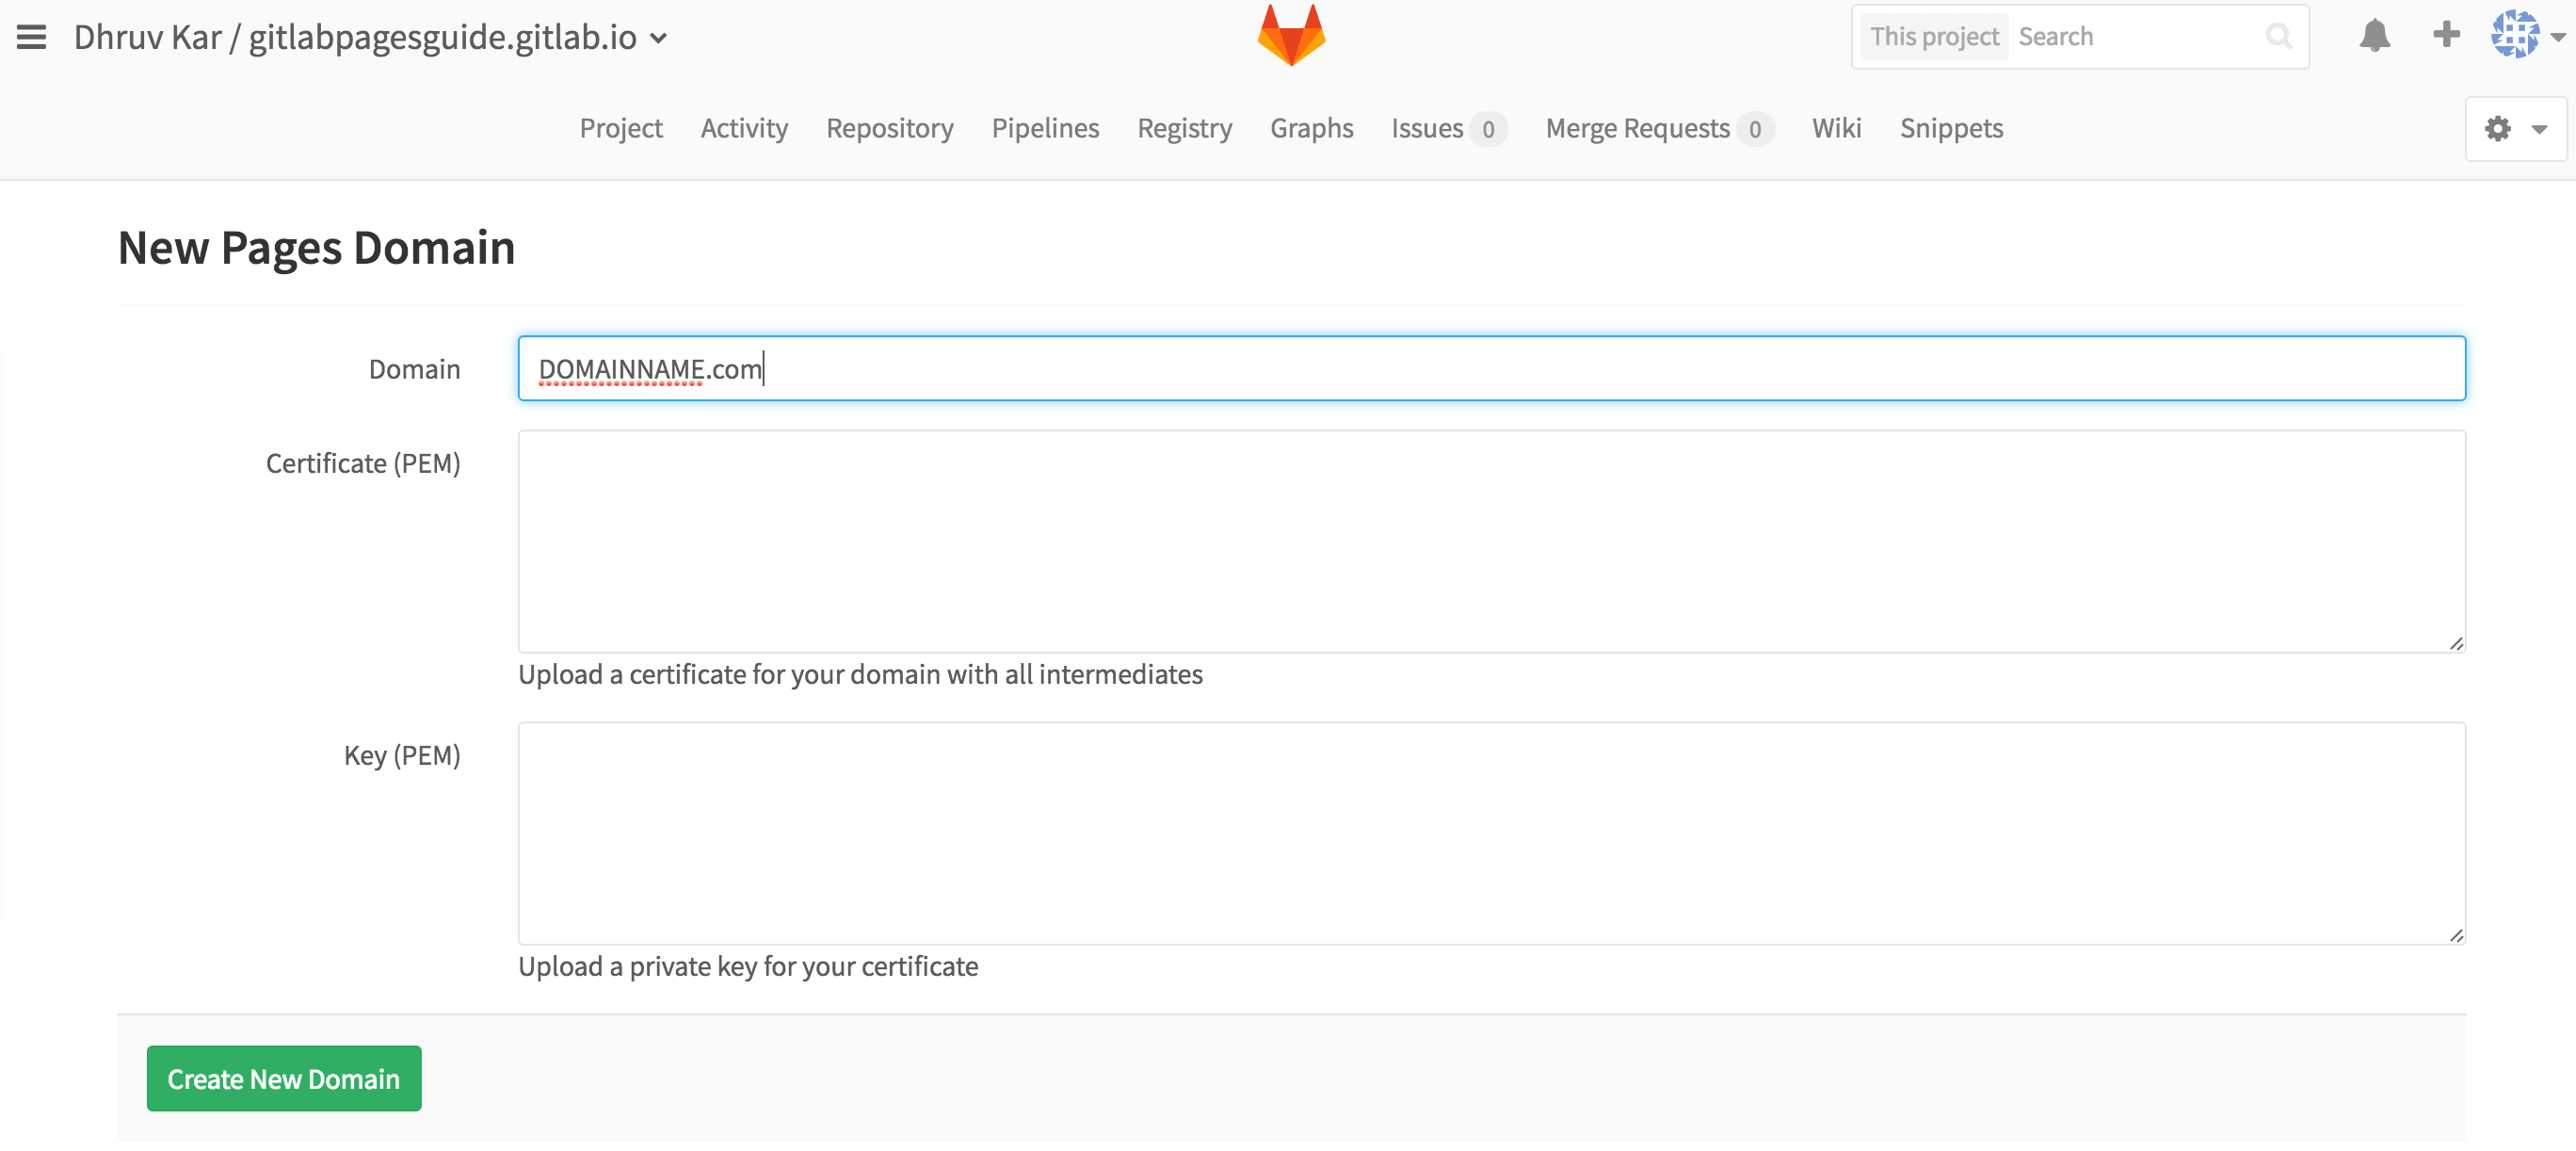
Enter in your domain name starting with www. Then click Create New Domain on the bottom left.
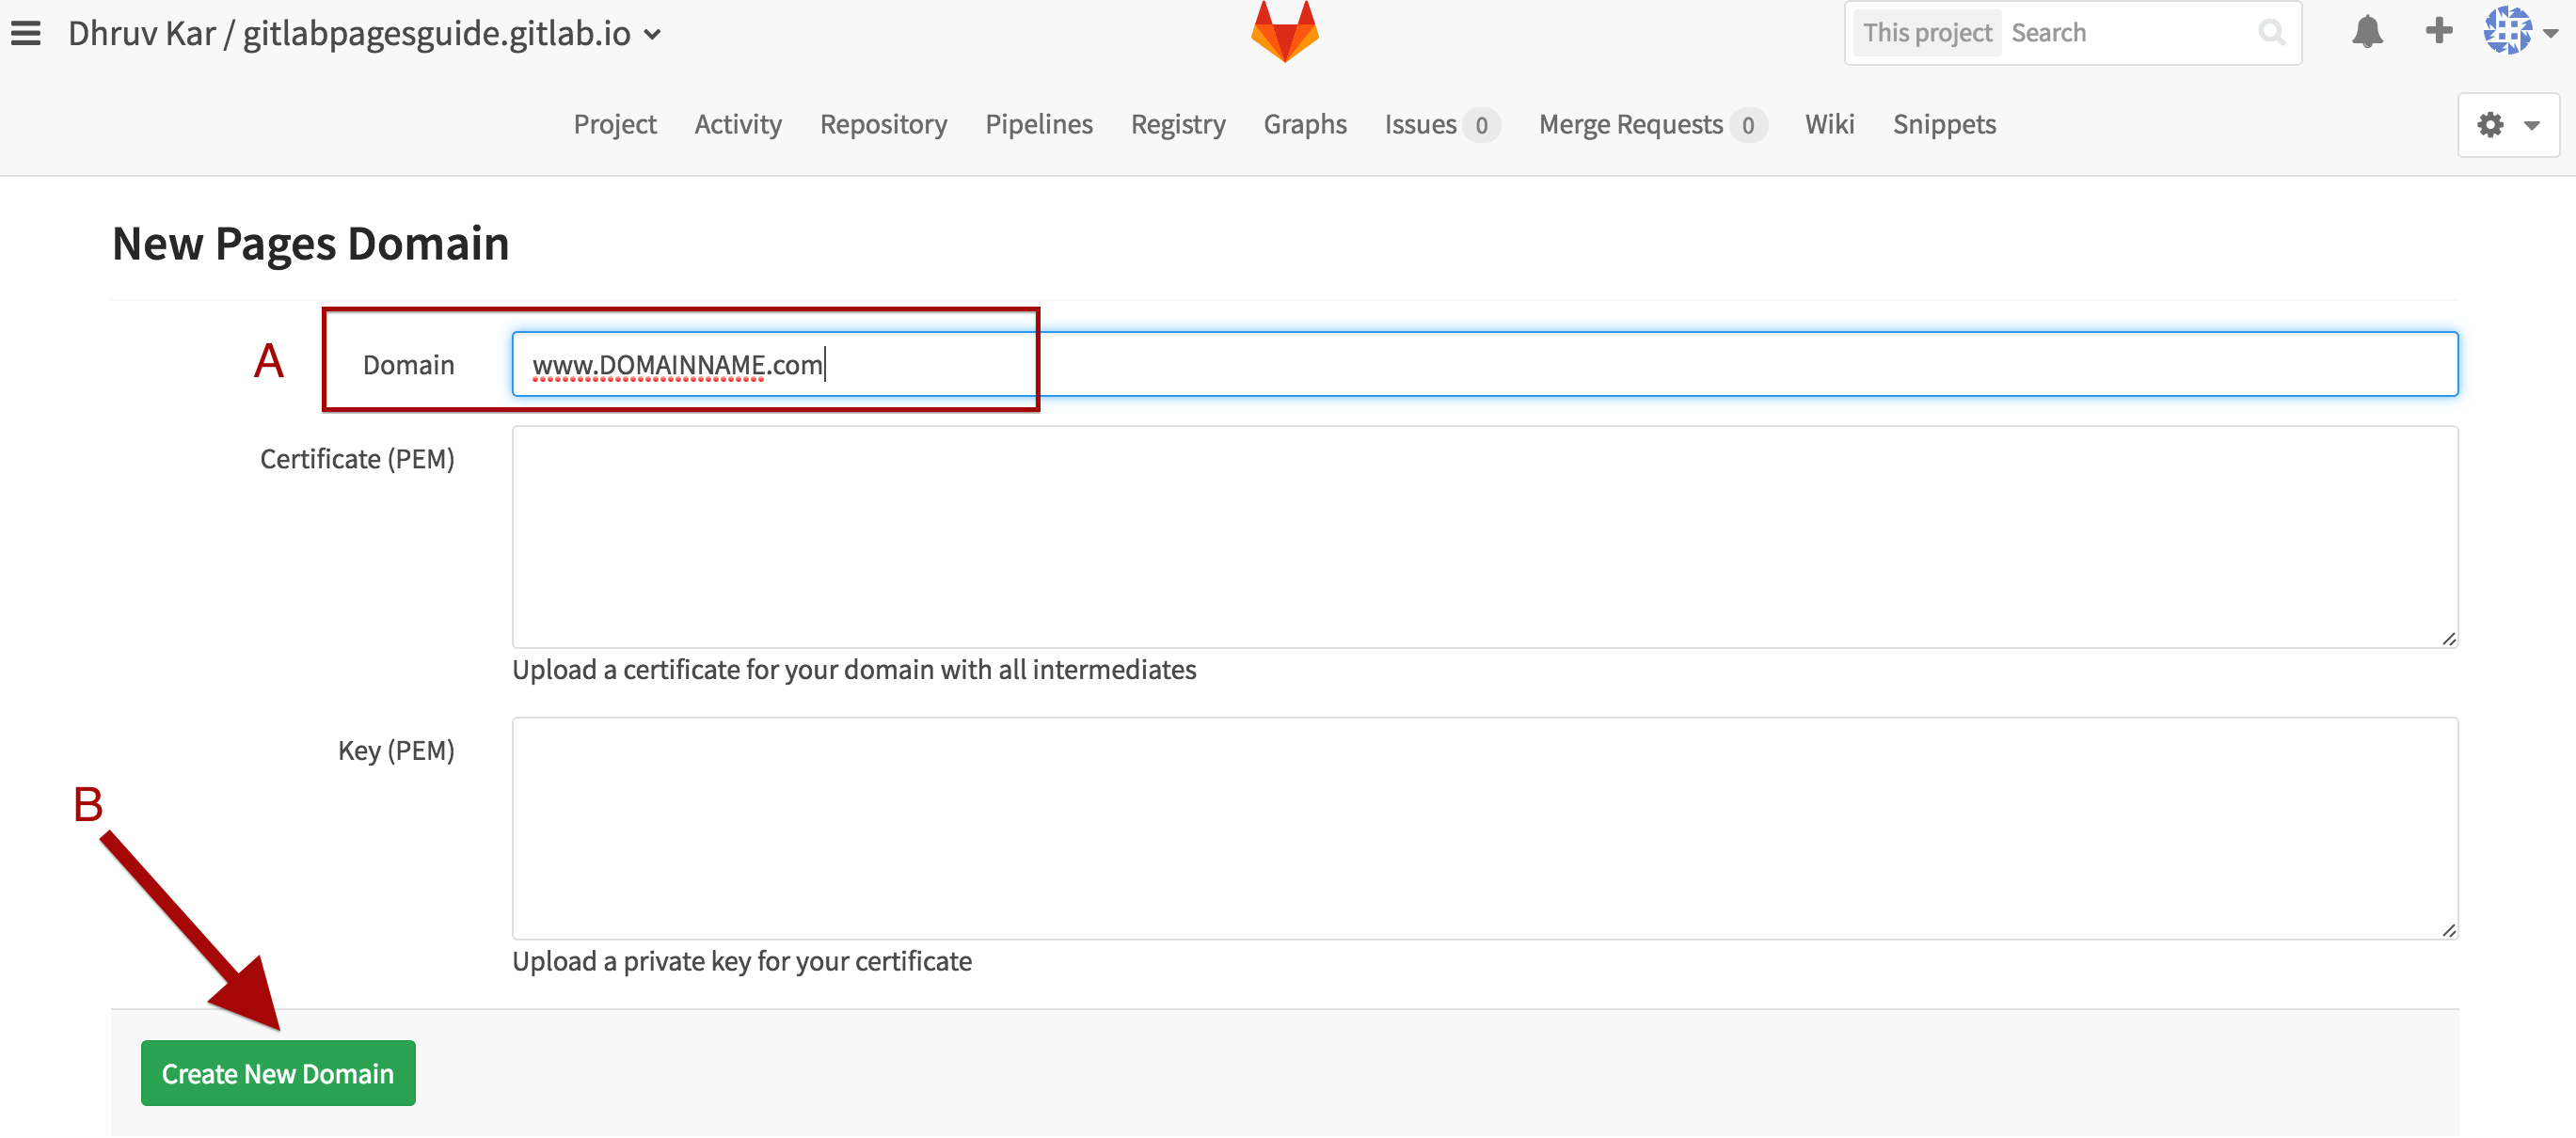
Also add your domain without a www.
This way your website will be accessible at both YOURDOMAIN.com and www.YOURDOMAIN.com.
E. Test It 
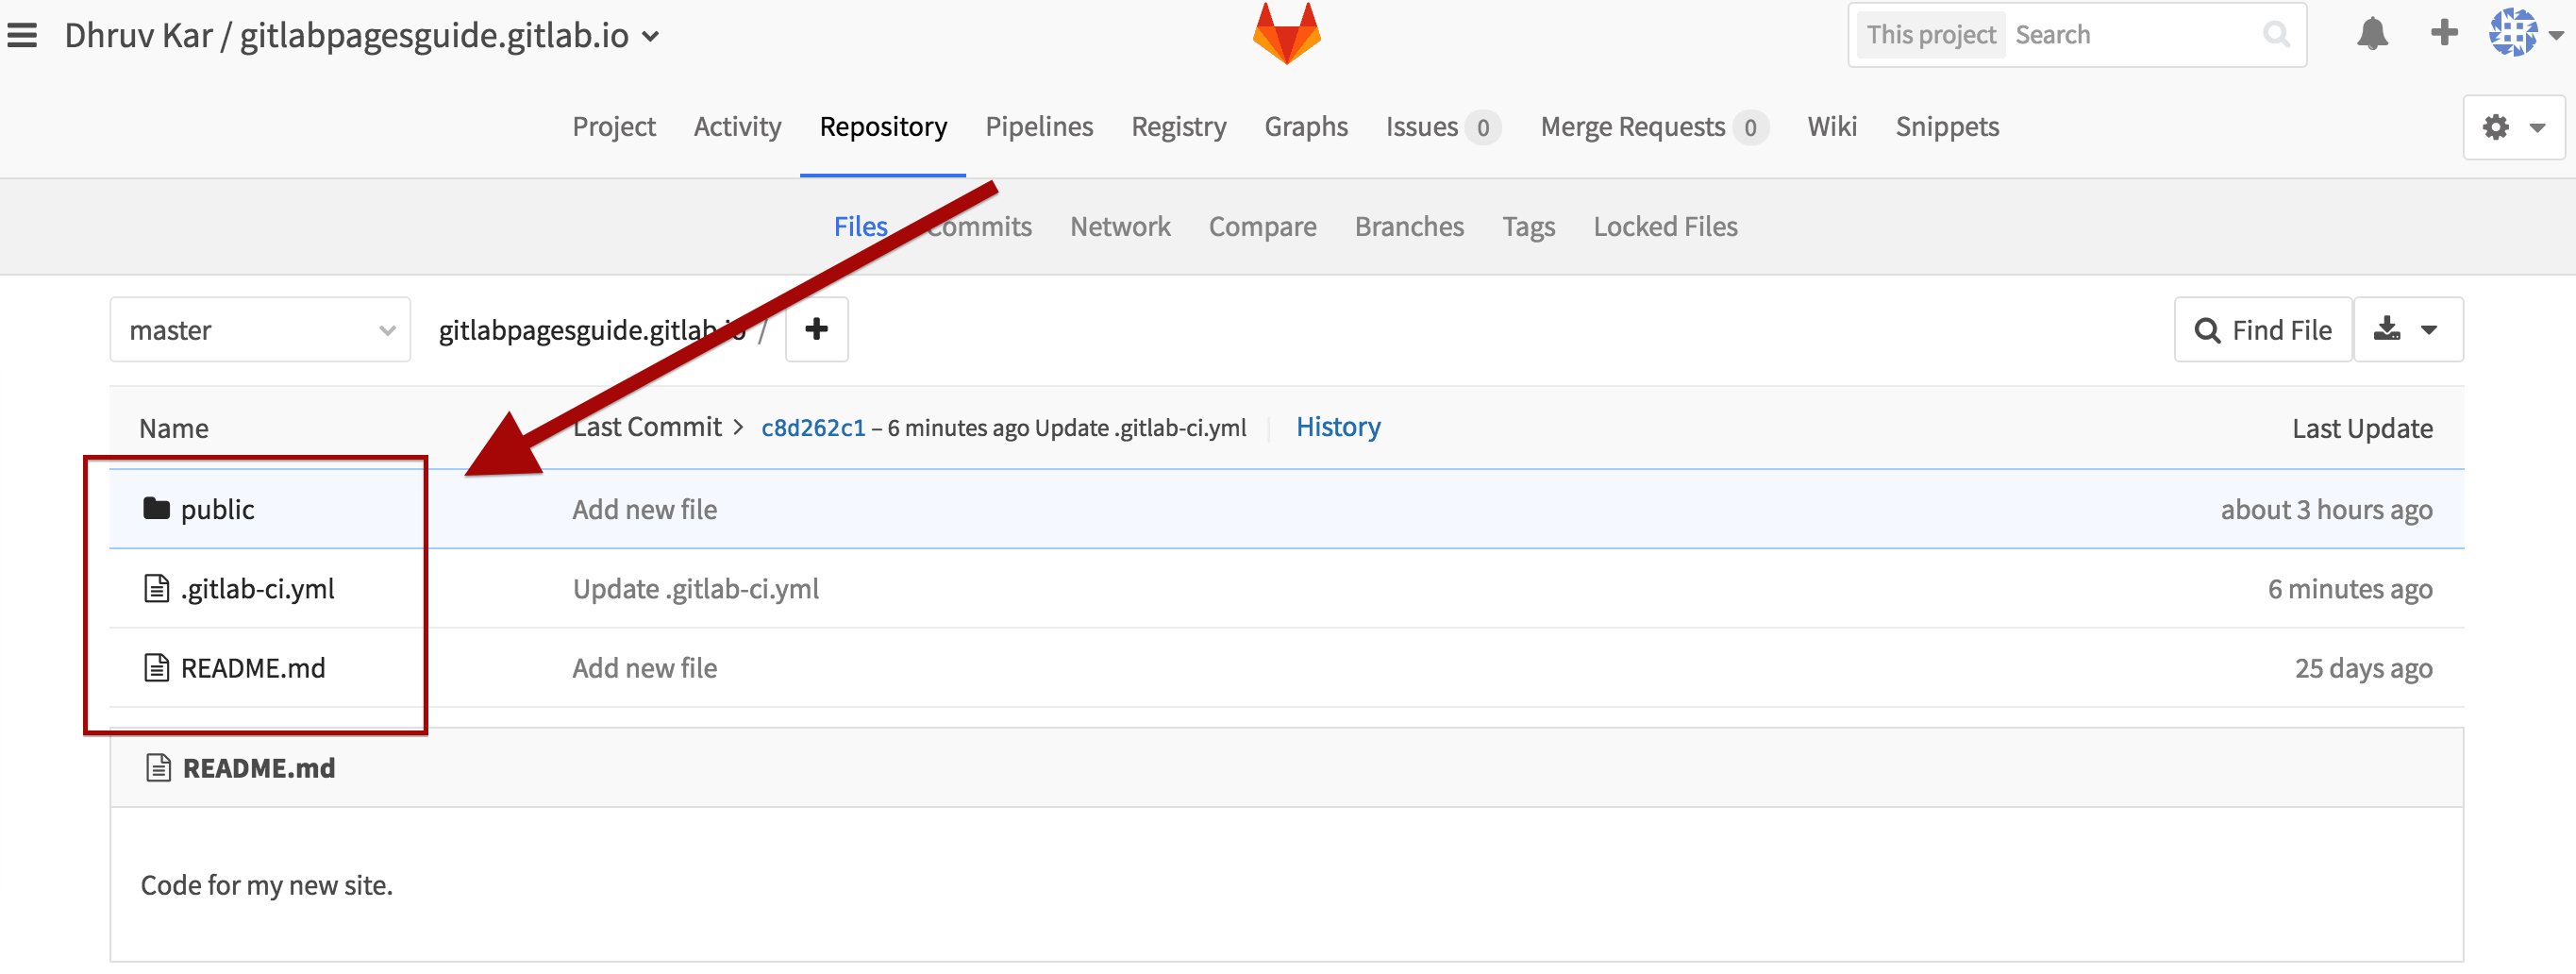
In your Gitlab project, add a new folder called public. This is the folder that will be served by Gitlab Pages, meaning files placed in this folder will show up on YOURDOMAIN.com (or YOURUSERNAME.gitlab.io if you haven’t setup a custom domain). So your project should now contain a folder named public, a README.md, and a .gitlab-ci.yml file.
Special Files
Files named 404.html and index.html are treated specially.
- index.html: These are treated as the homepage of the directory they’re in. The index.html file in the public folder will be the homepage of your website.
- 404.html: These are displayed when the user tries to access a page that doesn’t exist. You just need one of these, and it should be in the root (public) folder.
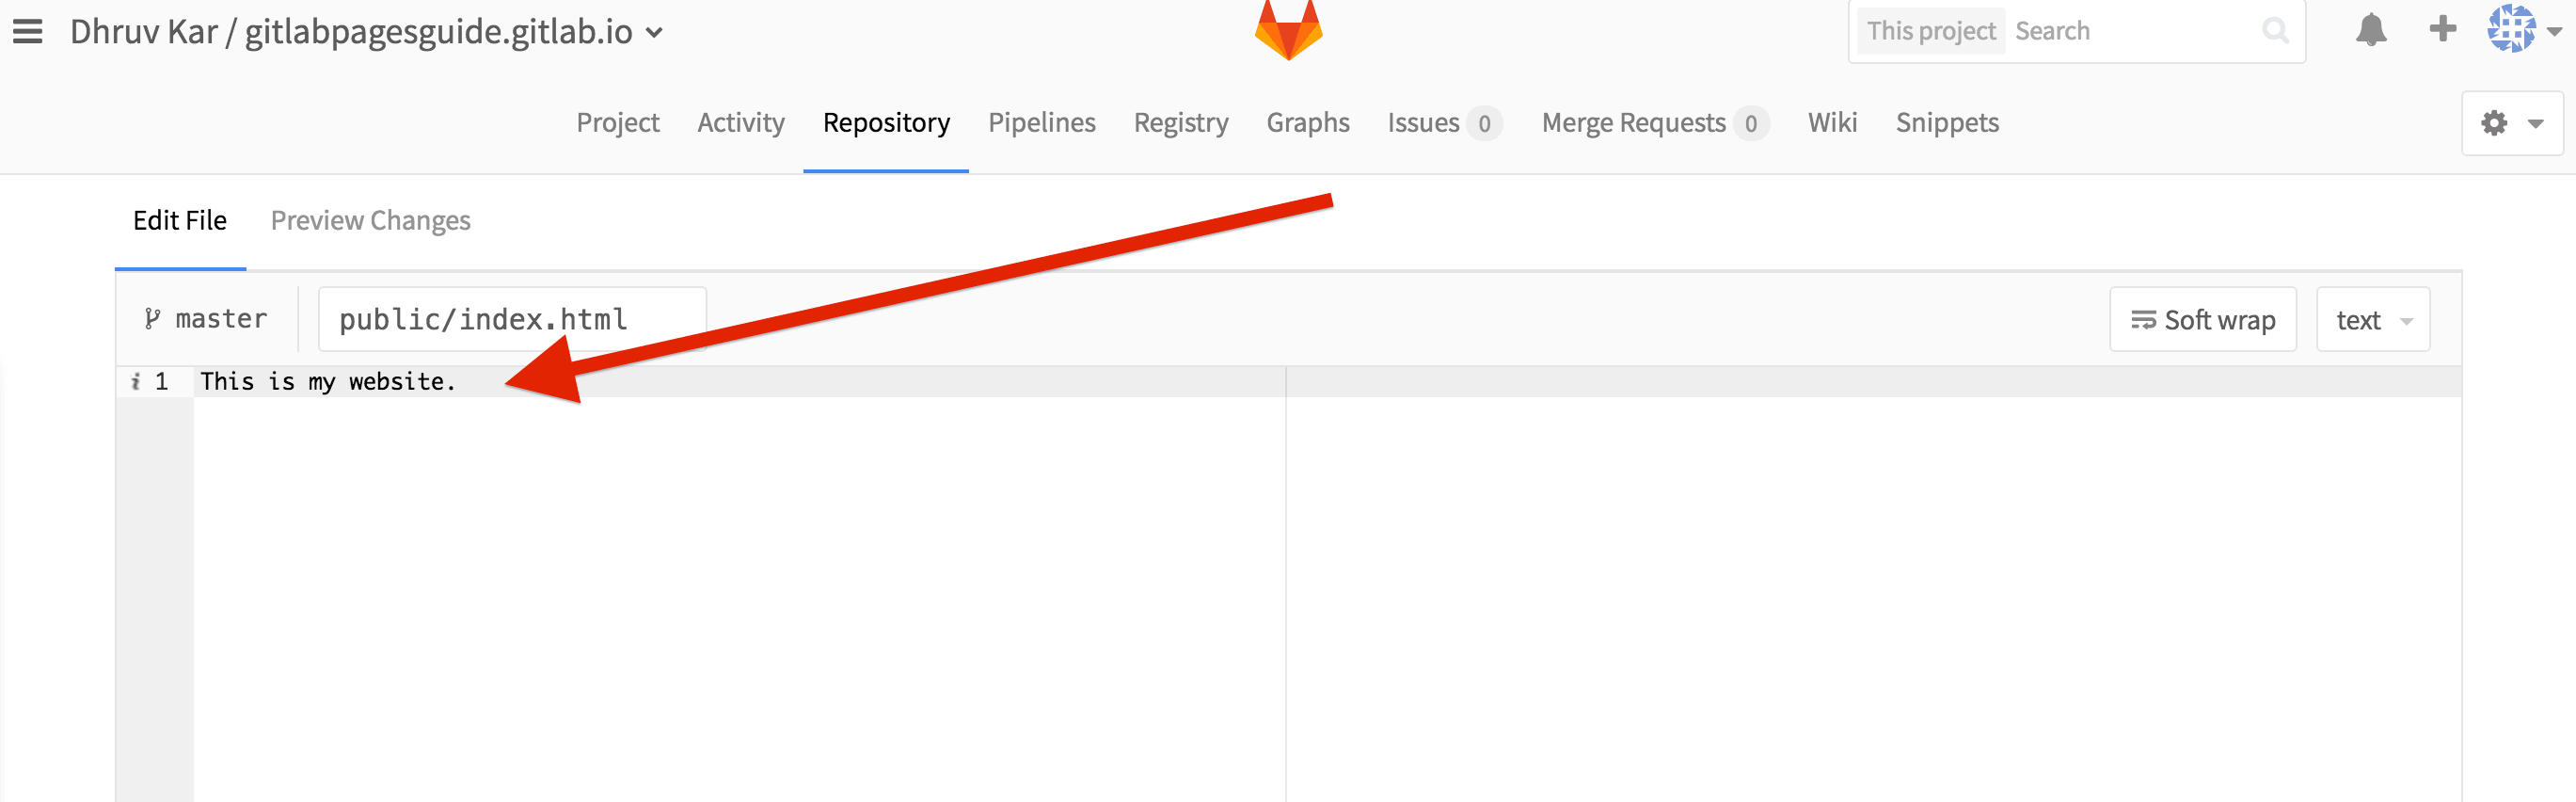
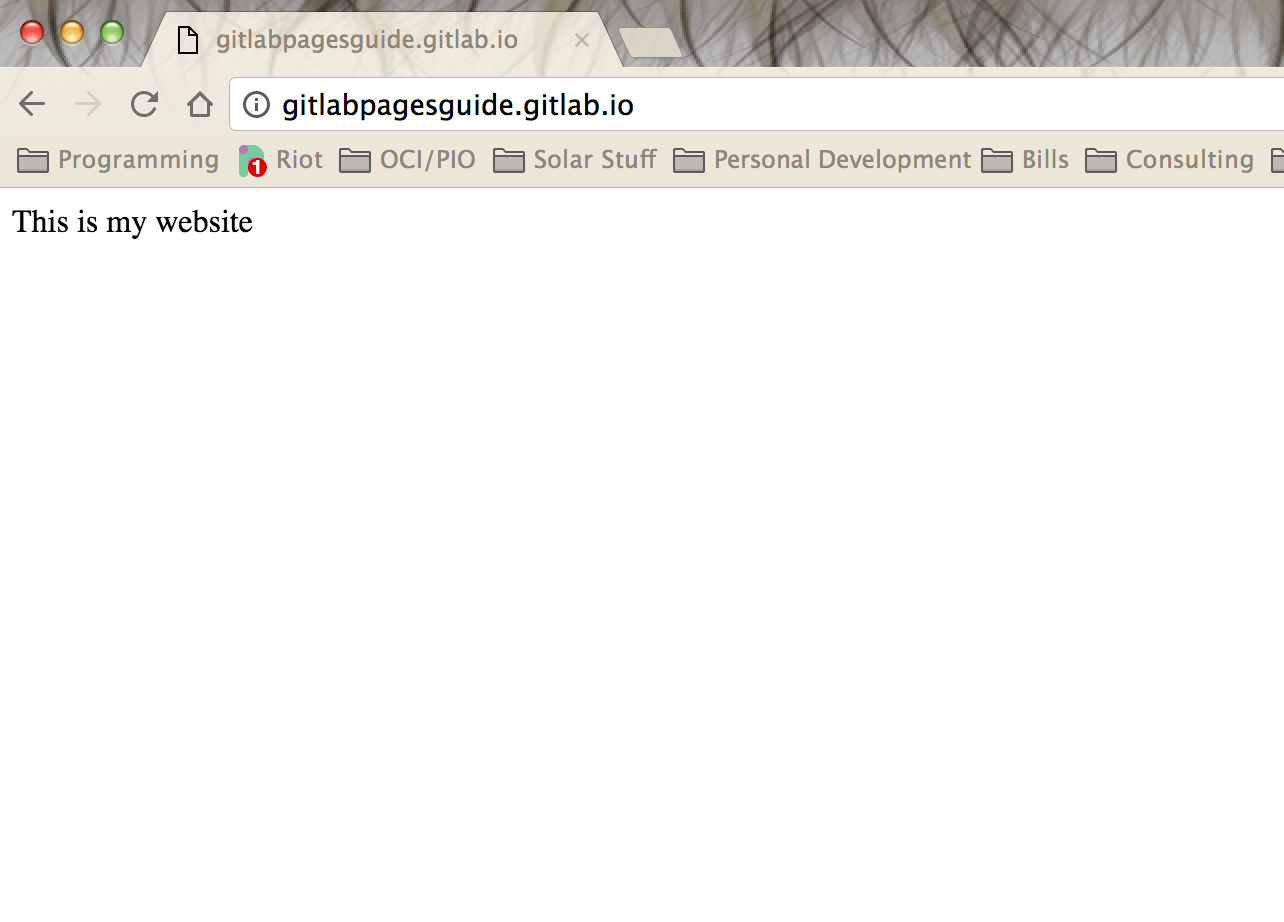
In the public folder, add a new file called ‘index.html’. Edit index.html and add:
This is my website
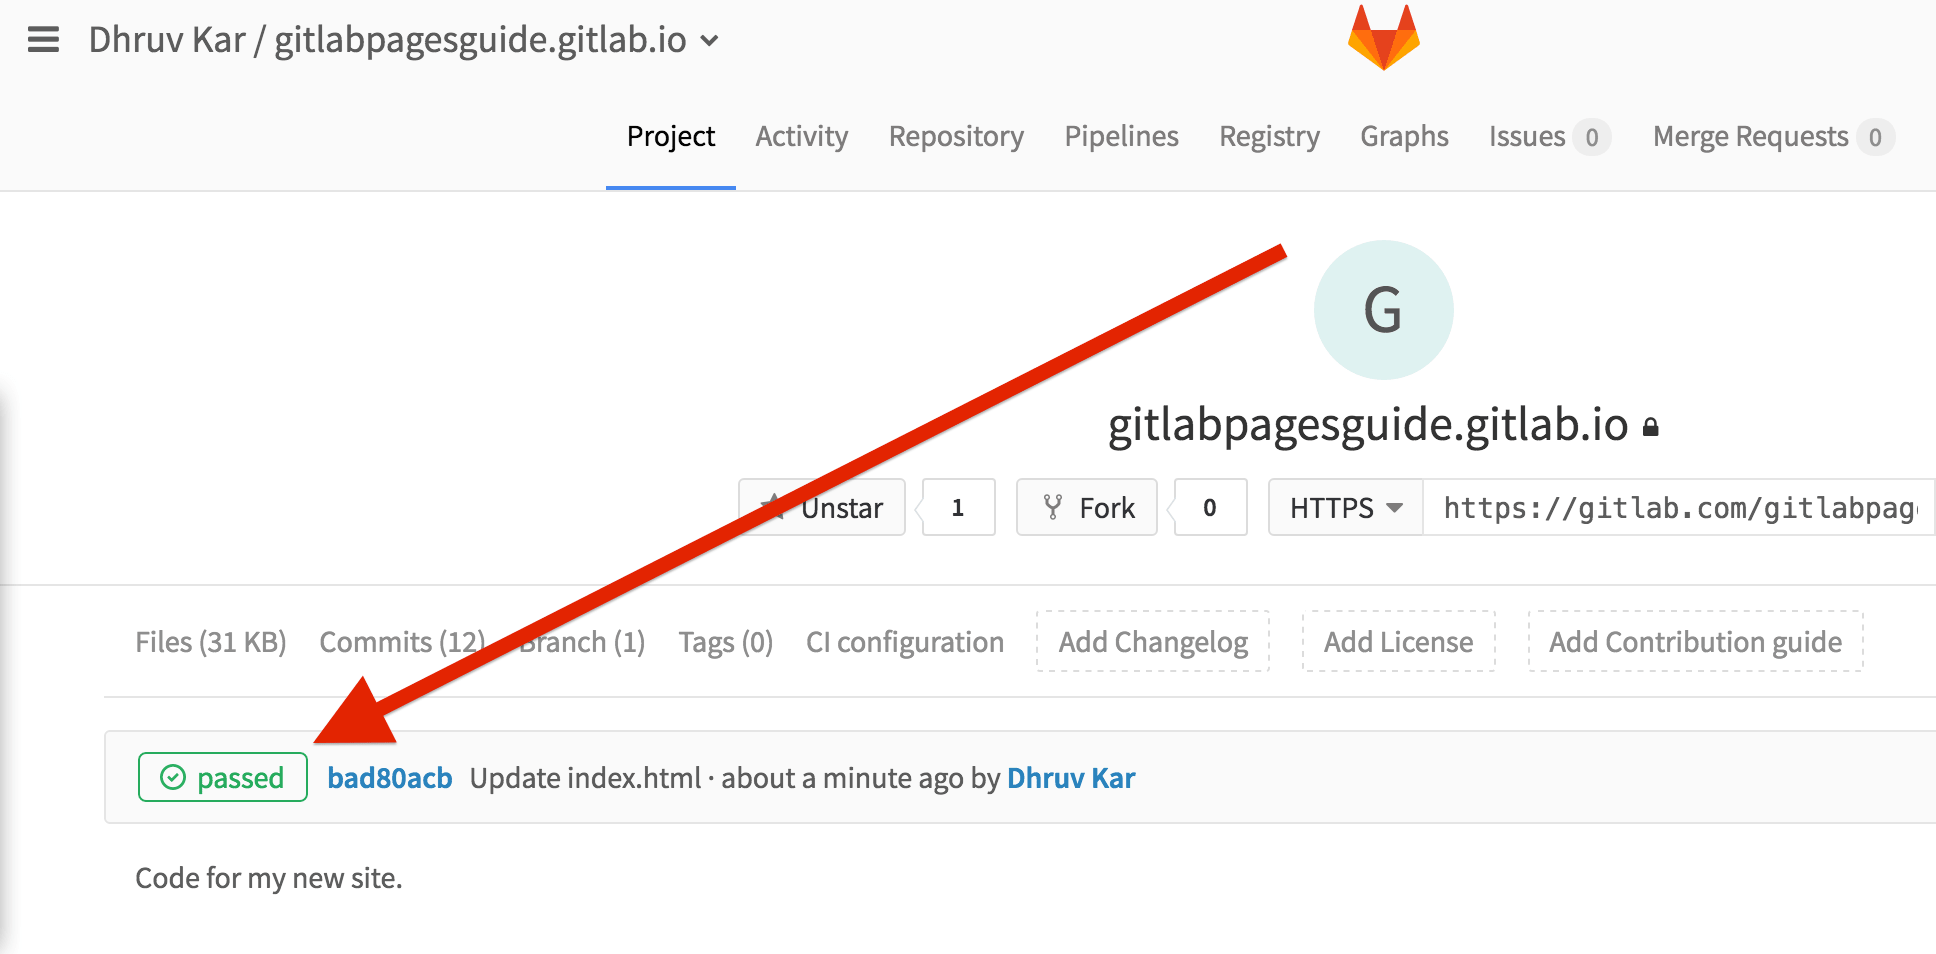
Click Commit Changes at the bottom. Once the CI file runs through and shows passed under the Project tab, you should be able to access this on YOURUSERNAME.gitlab.io and your own domain (if you set it up).
At this stage, your website should look like this. Yay.
In Part 2, we’re going to go over adding more HTML, some CSS and Javascript to start building a functional site. In the meantime, check out HTML Basics and see if you can create more pages.
Let me know when Part 2 is published.